完整 Stable Diffusion 教學:從 Colab 到本地端,快速上手 Web UI 生成精美圖像

目錄
Stable Diffusion 簡介:
Stable Diffusion(穩定擴散)是一種基於擴散模型的生成技術,於2022年由德國CompVis與Stability AI、Runway聯手推出。這款模型專為根據文字描述生成精美圖像而設計。
為了簡化使用過程,AUTOMATIC1111開發了Stable Diffusion WebUI(SD WebUI)圖形化界面,讓用戶可以輕鬆地創建和修改圖片。只需提供文字提示,AI便能根據描述生成相應的圖像,並支持模仿現有風格或進行圖像修復。
此外,該工具還允許用戶訓練自定義模型,以更精確地產出想要的結果。
本地端部署Stable Diffusion WebUI
我的電腦規格:
- 系統:macOSMonterey
- GPU:Apple M1
- VRAM:共享系統(最大16GB)
- RAM:16GB (CPU和GPU共享)
要先裝python3.10,如果沒有安裝的要去裝python3.10。
brew install cmake protobuf rust python@3.10 git wget
git clone Stable Diffusion WebUI
git clone https://github.com/AUTOMATIC1111/stable-diffusion-webui
安裝stable-diffusion-webui
cd stable-diffusion-webui
找到你剛剛gitclone 下來的目錄,然後輸入./webui.sh,第一次跑要跑比較久。如果有遇到錯誤的話再把錯誤貼上google,去慢慢解。
下載Model
如果在安裝AUTOMATIC1111,發現你電腦沒有任何繪圖模型,系統會自動安裝1-5-pruned-emaonly.safetensors,這邊如果要更換其他模型,可以去 Hugging Face下載。
載完之後把.ckpt或是.safetensors放到stable-diffusion-webui/models/Stable-diffusion,就可以使用了。
這邊補充一下Stable-diffusion有幾個比較重要的資料夾
- extensions: 用來擴展 Web UI 功能的插件。
- models/stable-diffusion: 存放 Stable Diffusion 基本模型文件。
- outputs: 存放生成的圖像和其他輸出資料。
安裝完成後,也將models放到指定目錄之後,就可以開始算圖了,這邊先是算一張圖。
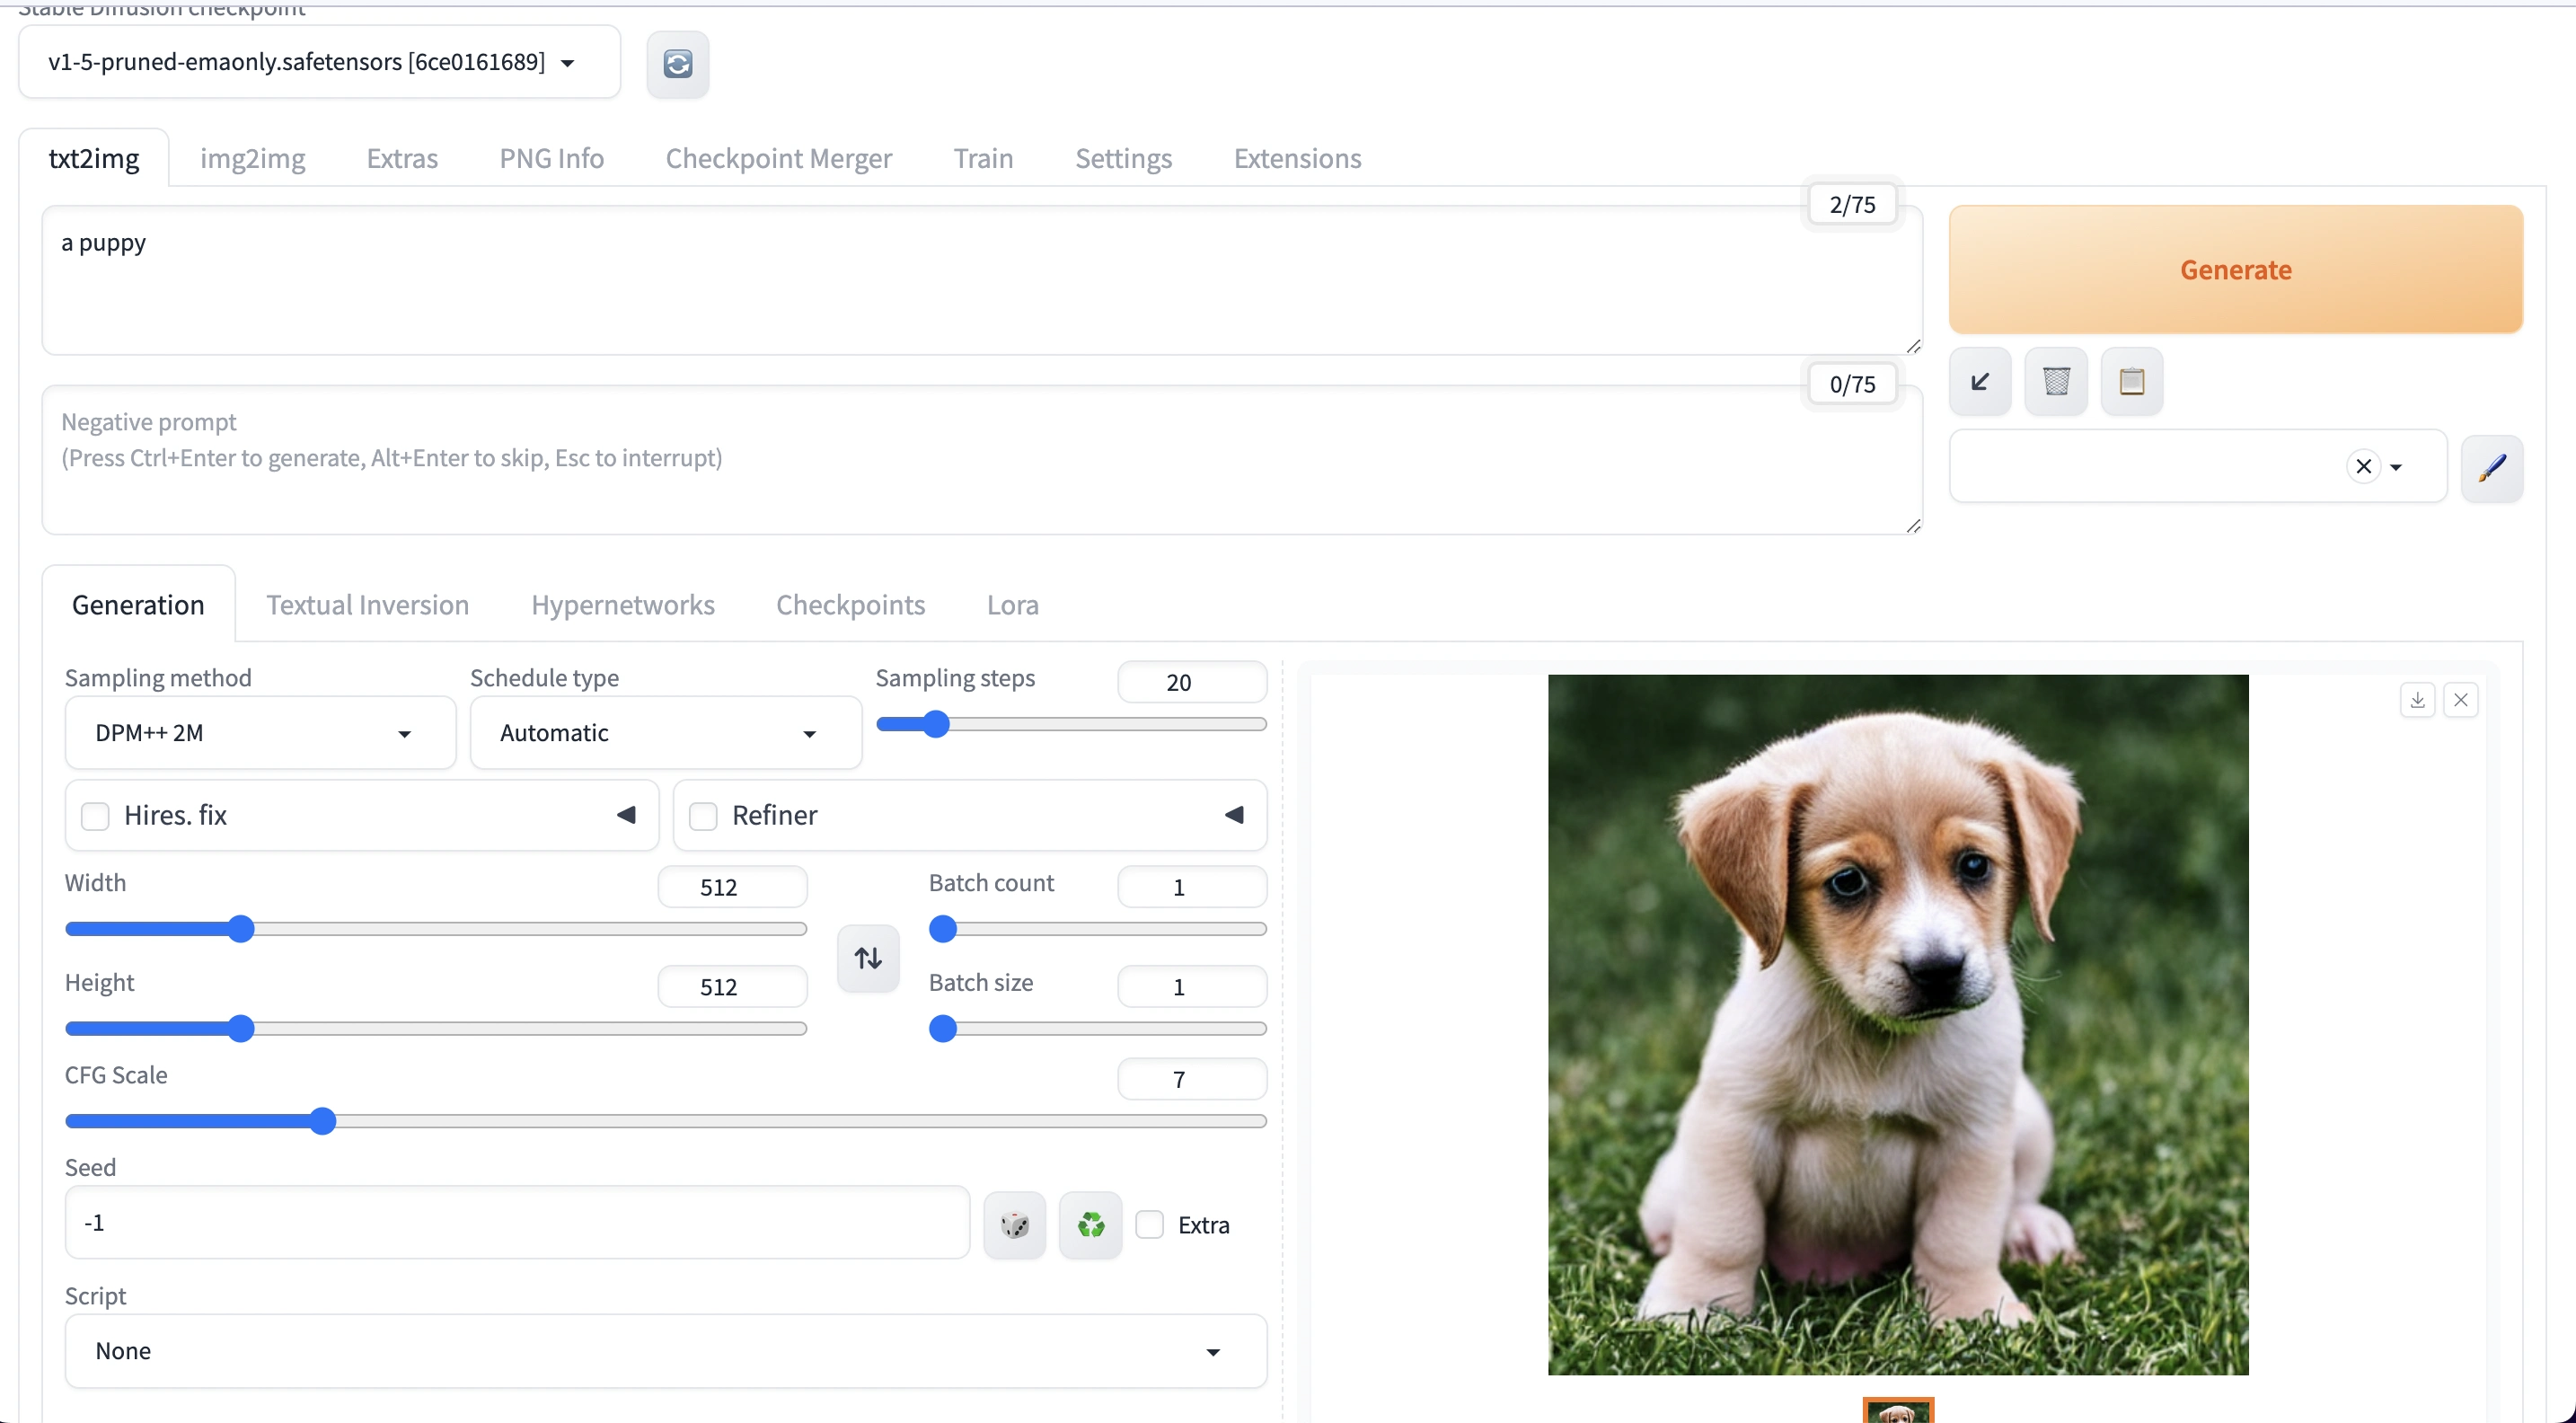
由於我的電腦規格實在是太差了,我算了好幾張失敗品,好幾次都跑到我的mac m1 直接關機,因為mac m1 gpu跟cpu是共用記憶體,所以VRAM非常不夠,我剛跑幾張就顯示記憶體已滿,而且幾乎高解析度都要跑10分鐘以上。這邊放上失敗品,這還是跑了10多分鐘的結果- -

如果條件允許的話,最好還是去買一張12GB VRAM以上的Nvidia GPU。不過也是有替代方案,就是使用線上服務。
Colab 部署Stable Diffusion WebUI
Google Colab 就提供了很多運算資源即使是免費版的也有 Tesla K80 或 T4 GPU,
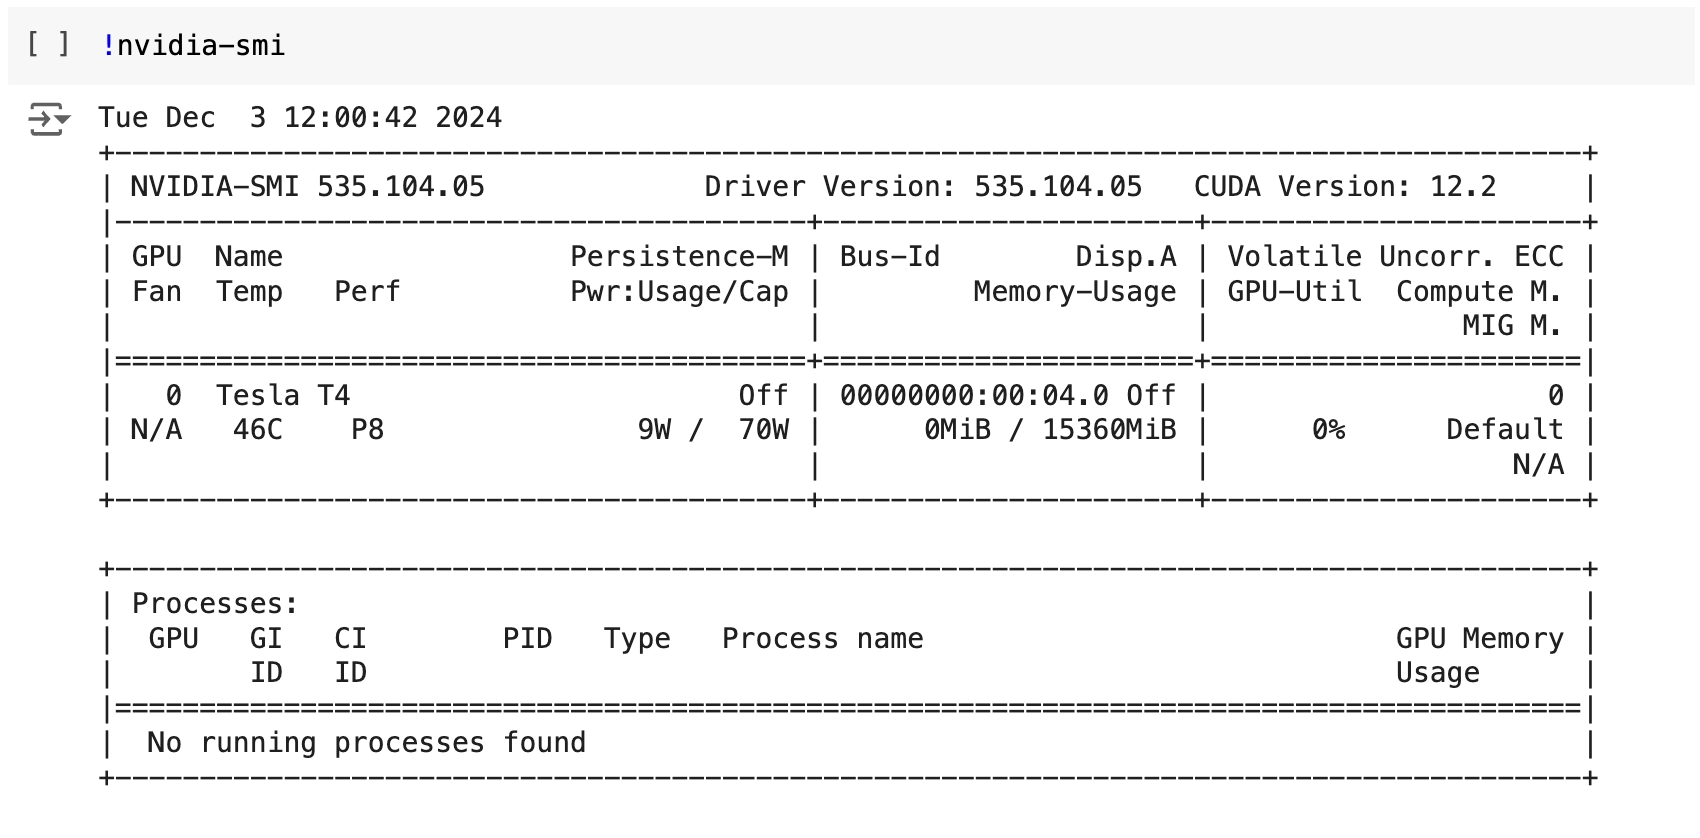
如何查看google colab gpu用量
這邊把部署工作步驟快速帶過,以下代碼只有安裝基本款,如果需要其他的擴展功能需要額外安裝,往後的文章我也會推薦擴展功能。
Step1:設定 Google Colab 環境
- 開啟 Google Colab:造訪 Google Colab 網站並建立一個新的筆記本。
- 啟用GPU:點擊"執行階段">變更執行階段類型>選擇T4 GPU ,然後點擊保存。
Step2:安裝必要的程式庫和依賴項
掛載 Google Drive :
from google.colab import drive
drive.mount('/content/drive')
這主要是加載你的雲端資料夾,將等等需要安裝的程式都存到google 雲端硬碟上。
建立一個資料夾來儲存 Stable Diffusion WebUI 文件:
!mkdir /content/drive/MyDrive/sd-webui-files
安装 PyTorch、torchvision 和 torchaudio:
!pip install -q torch==2.0.1+cu118 torchvision==0.15.2+cu118 torchaudio==2.0.2+cu118 torchtext==0.15.2 torchdata==0.6.1 --extra-index-url https://download.pytorch.org/whl/cu118 -U
安装 xformers 和 triton:
!pip install -q xformers==0.0.20 triton==2.0.0 gradio_client==0.2.7 -U
Clone Stable Diffusion WebUI:
!git clone --depth=1 https://github.com/AUTOMATIC1111/stable-diffusion-webui.git /content/drive/MyDrive/sd-webui-files/stable-diffusion-webui
下載 Stable Diffusion 模型
!wget -nc -P /content/drive/MyDrive/sd-webui-files/stable-diffusion-webui/models/Stable-diffusion https://huggingface.co/andite/anything-v4.0/resolve/main/anything-v4.5-pruned.safetensors
- !wget: 使用 wget 工具下載檔案。
- -nc: 如果檔案已存在,則不要重新下載。
- -P: 指定下載檔案的儲存路徑。
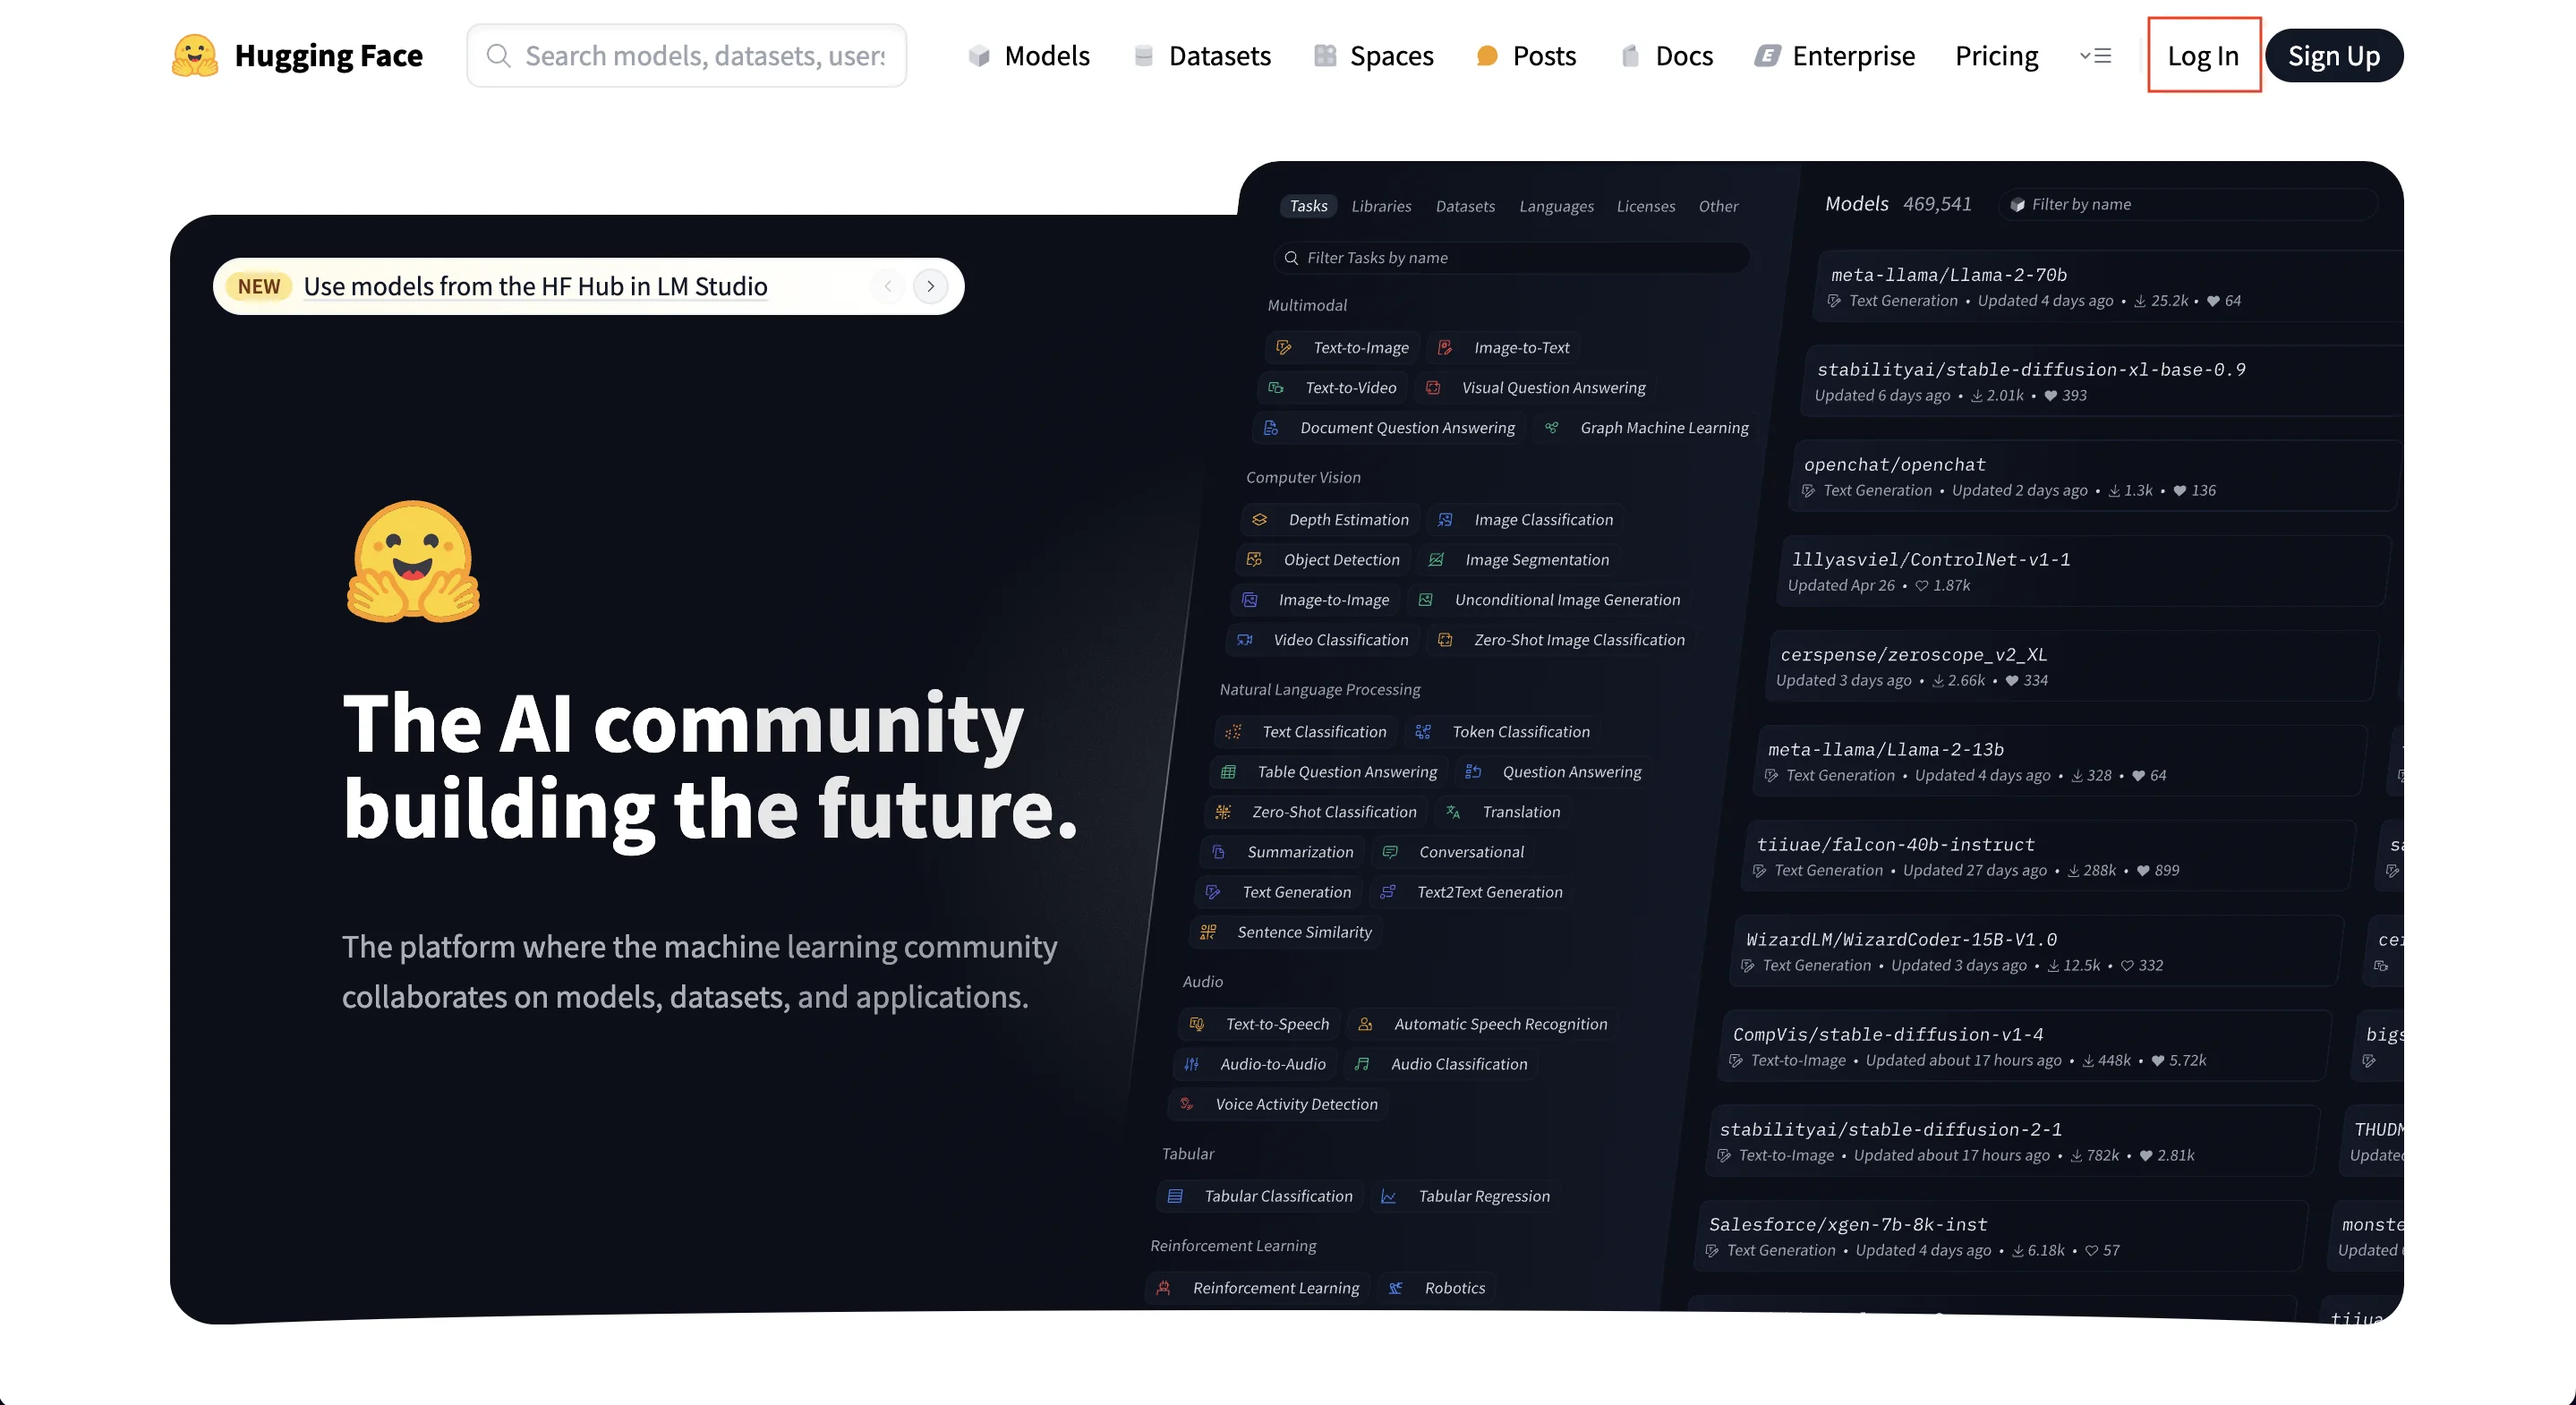
下載模型這邊需要特別注意的是,現在的Huggingface 似乎需要拿到Hugging Face Token,所以這邊需要登入huggingface。
如果沒有帳號則需要註冊一組點選"Sign Up",有的話點選"Log In"。
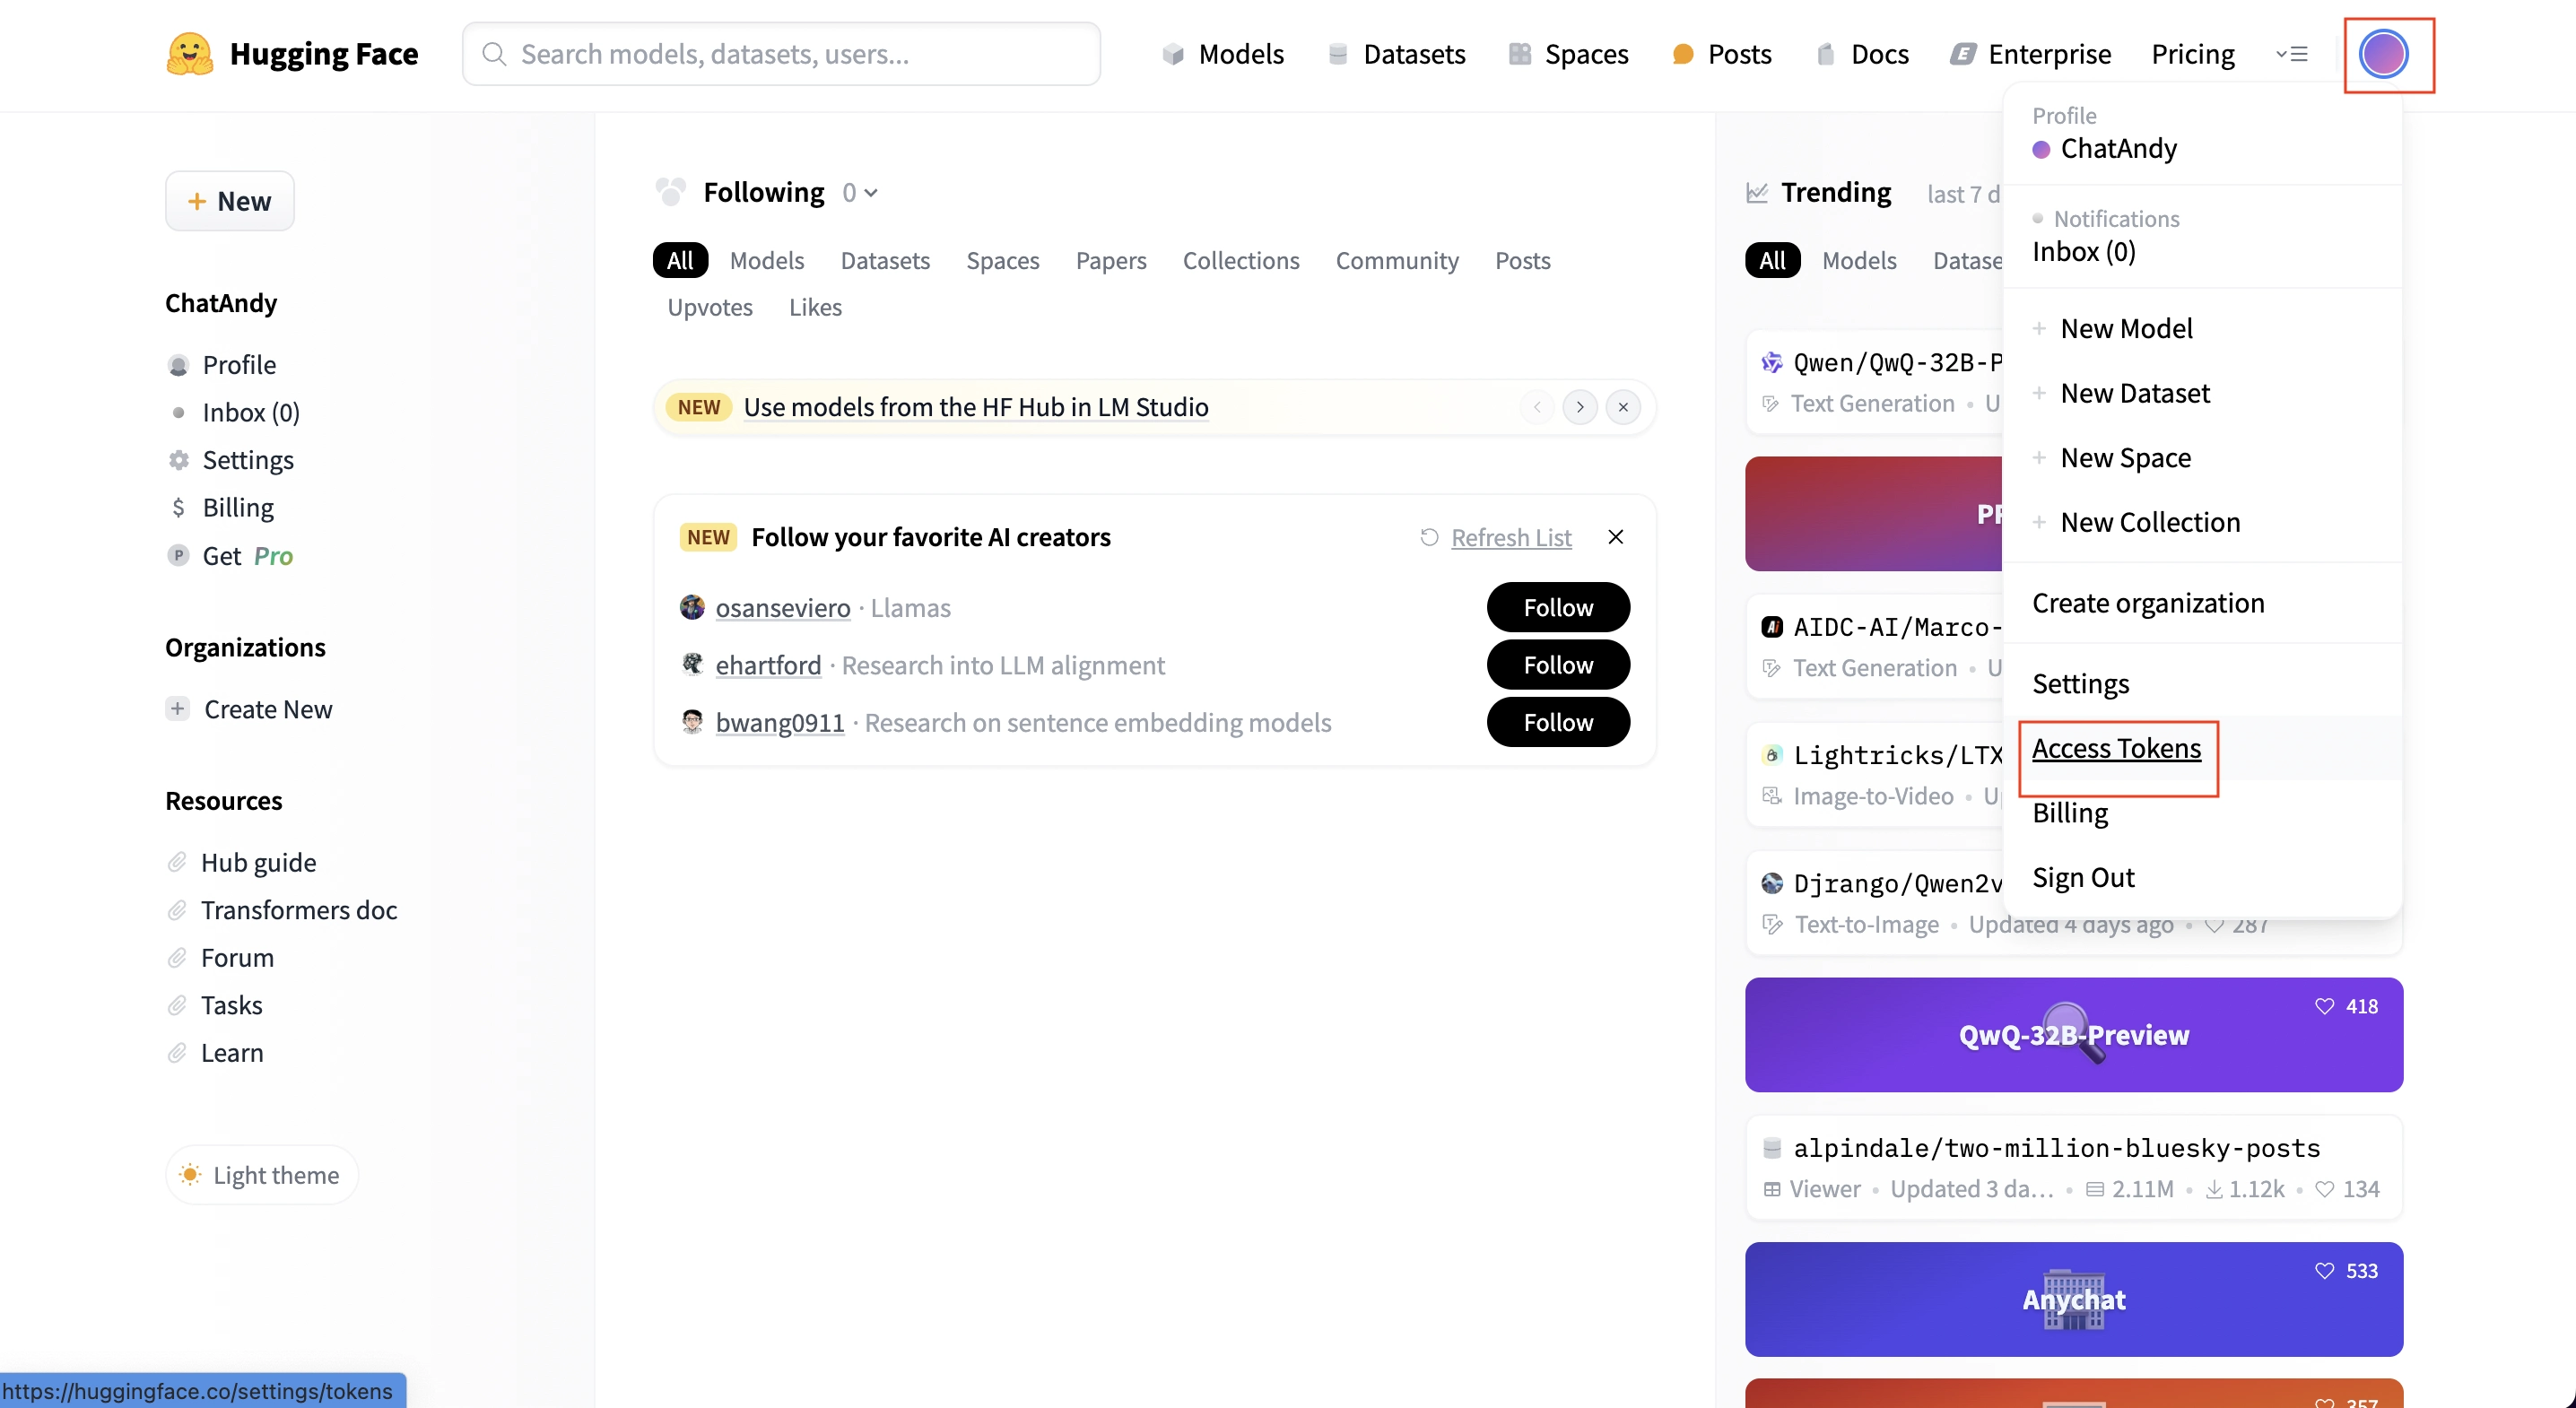
登入完後會看到這個畫面,然後點選"右上角頭像",接著點選"Access Tokens"
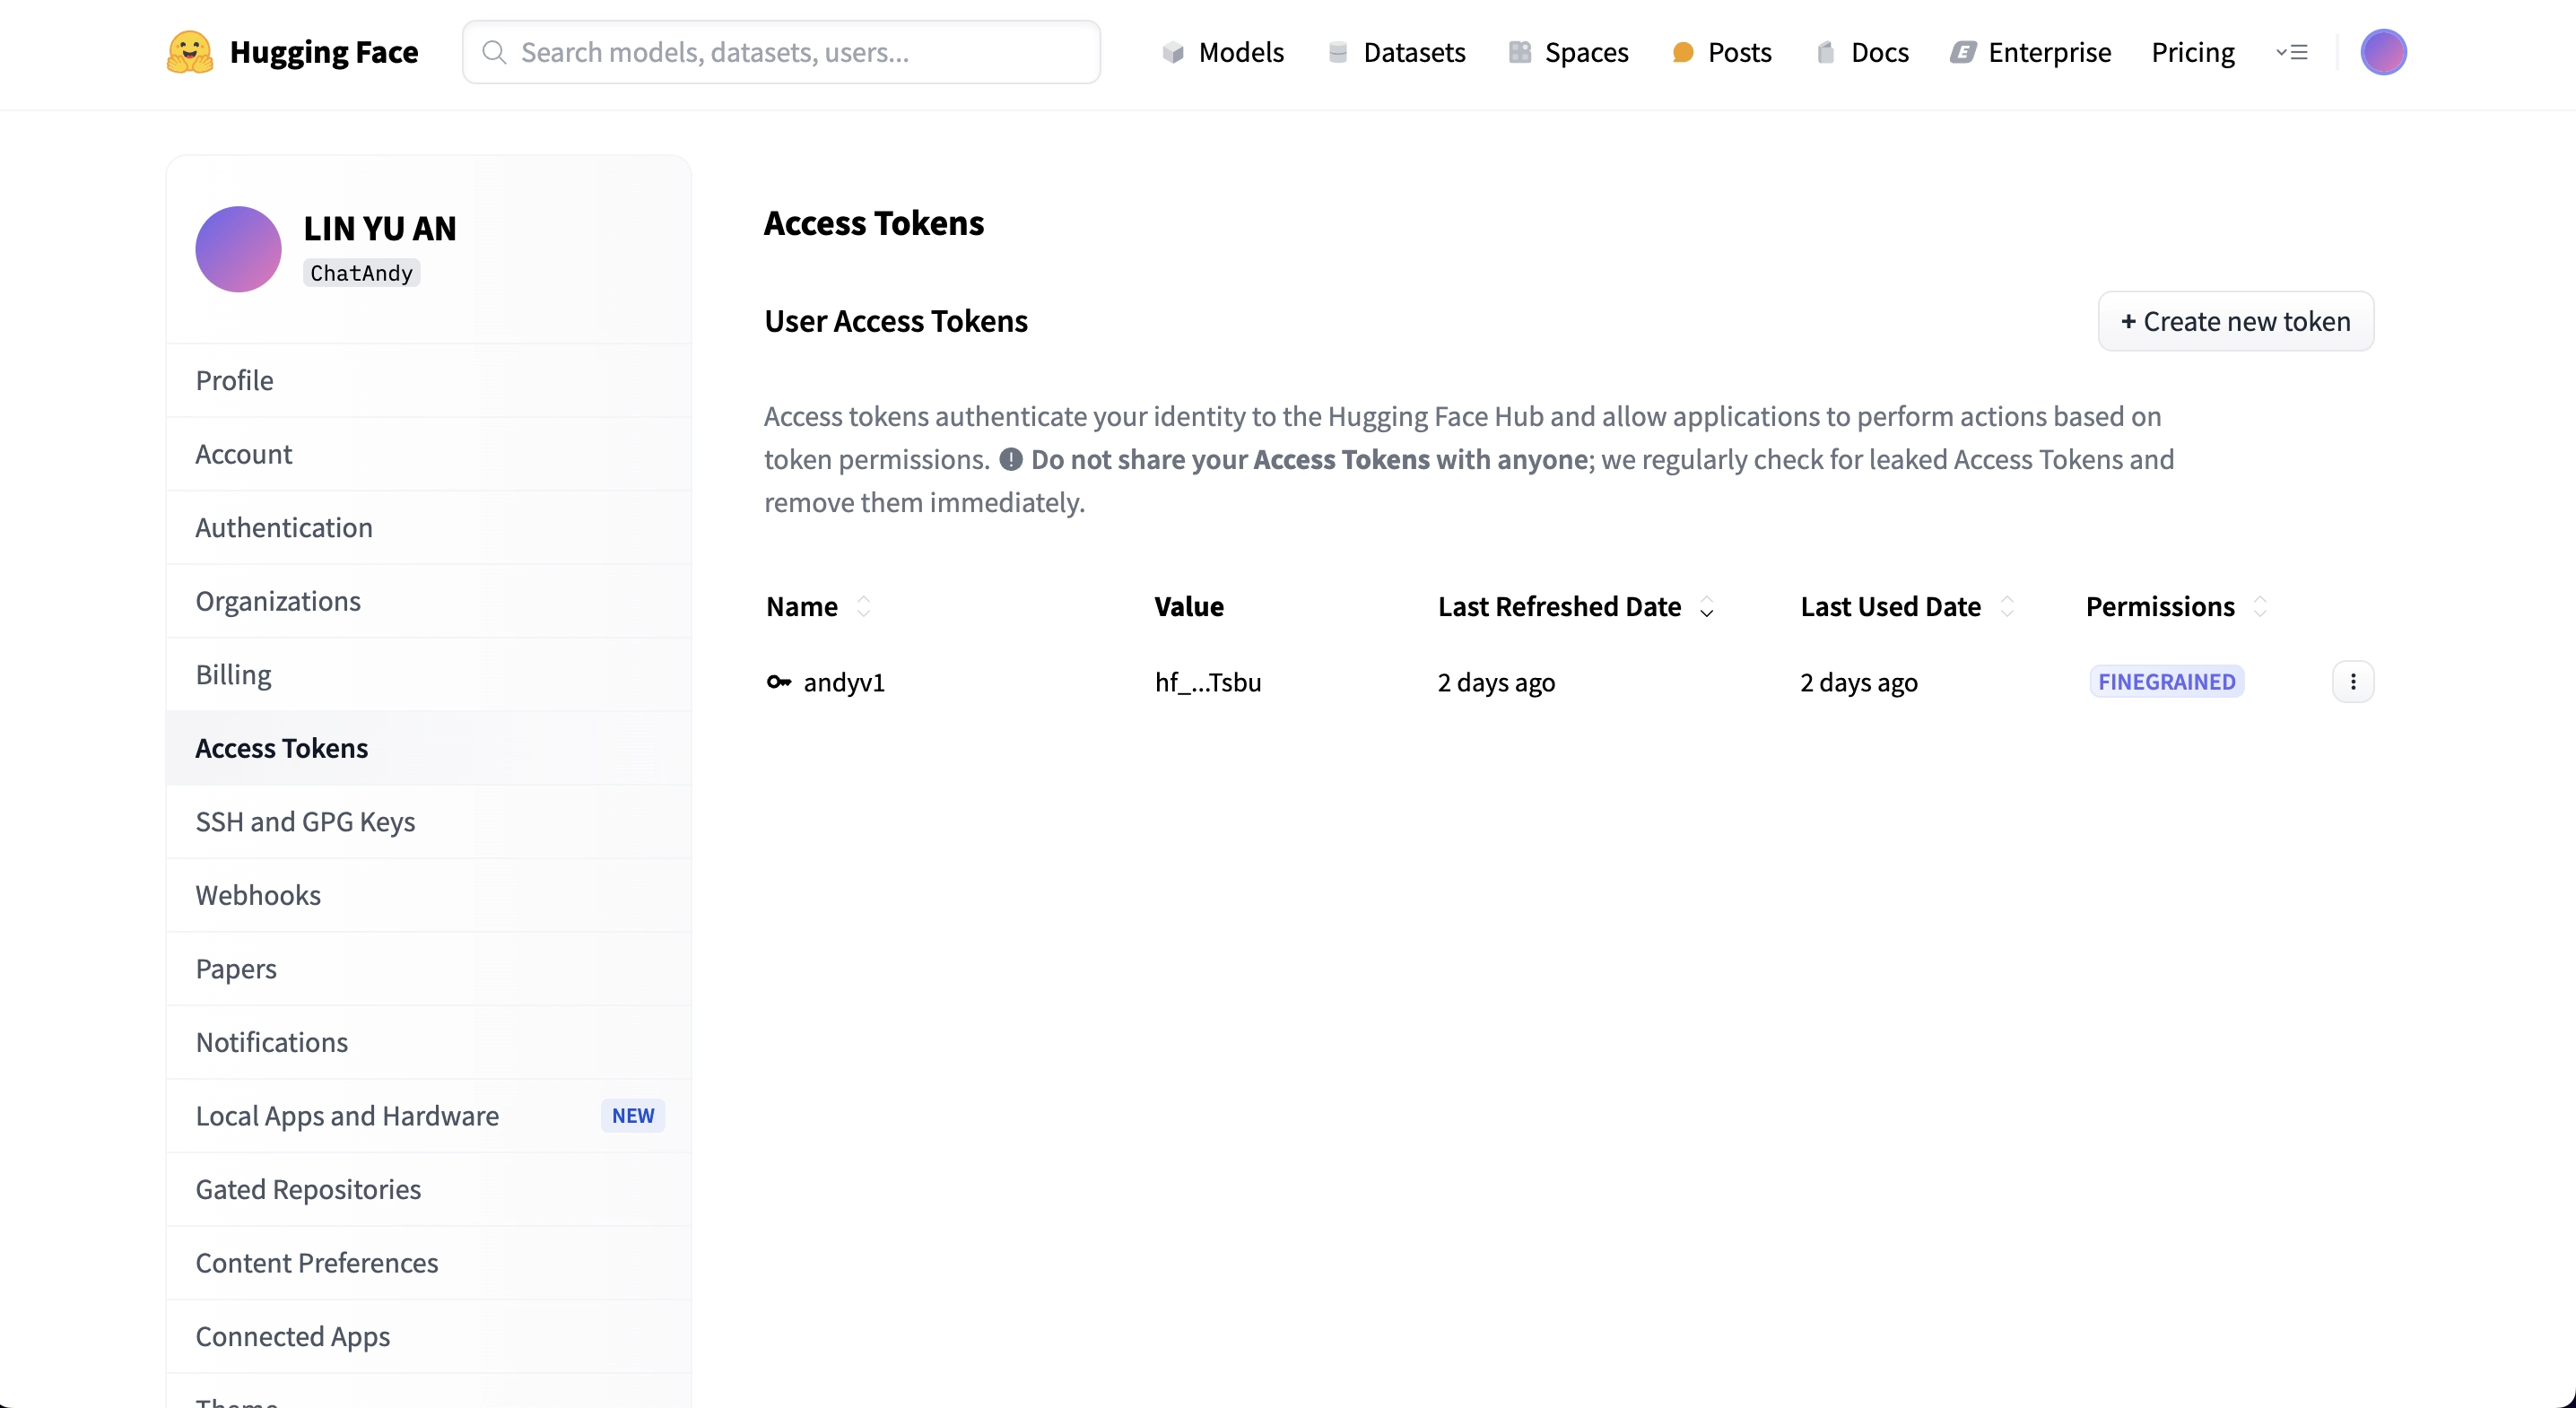
看到這個畫面後點選"Create New token"
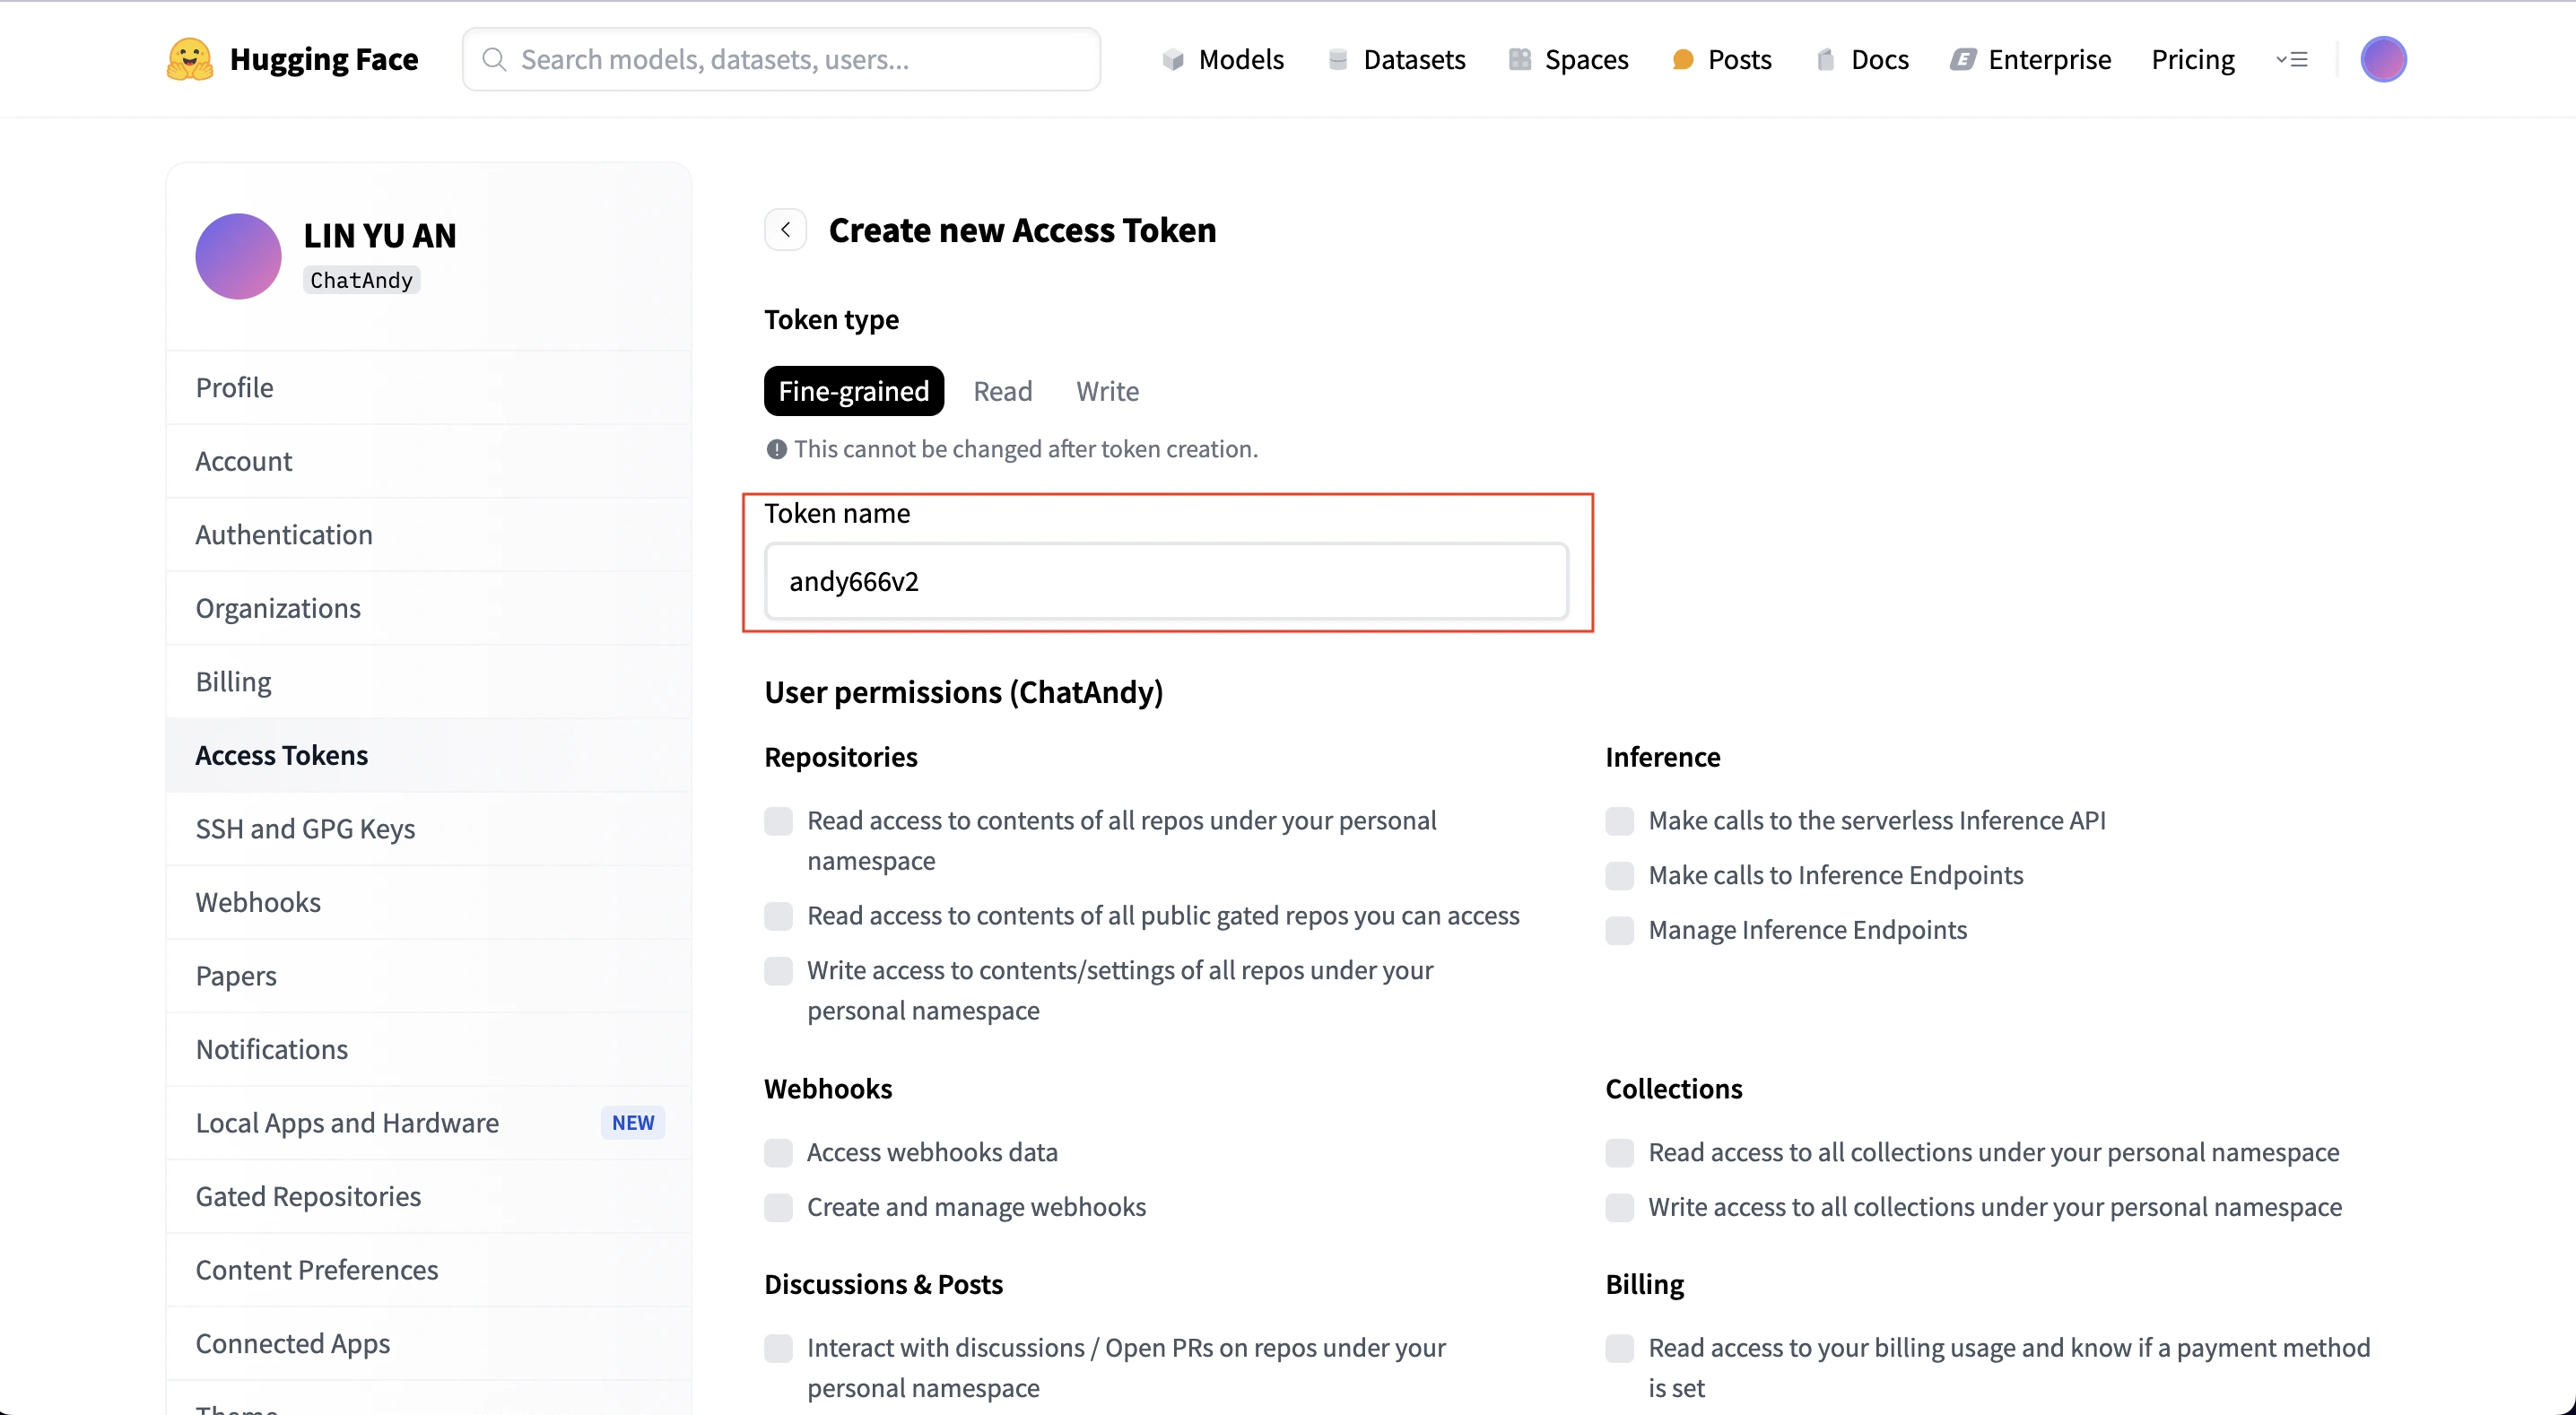
輸入"Token name"後,滑到最下面點選"Create token"
就會得到這個畫面,一定要複製保存起來,這是一次性的視窗,關掉就沒了。
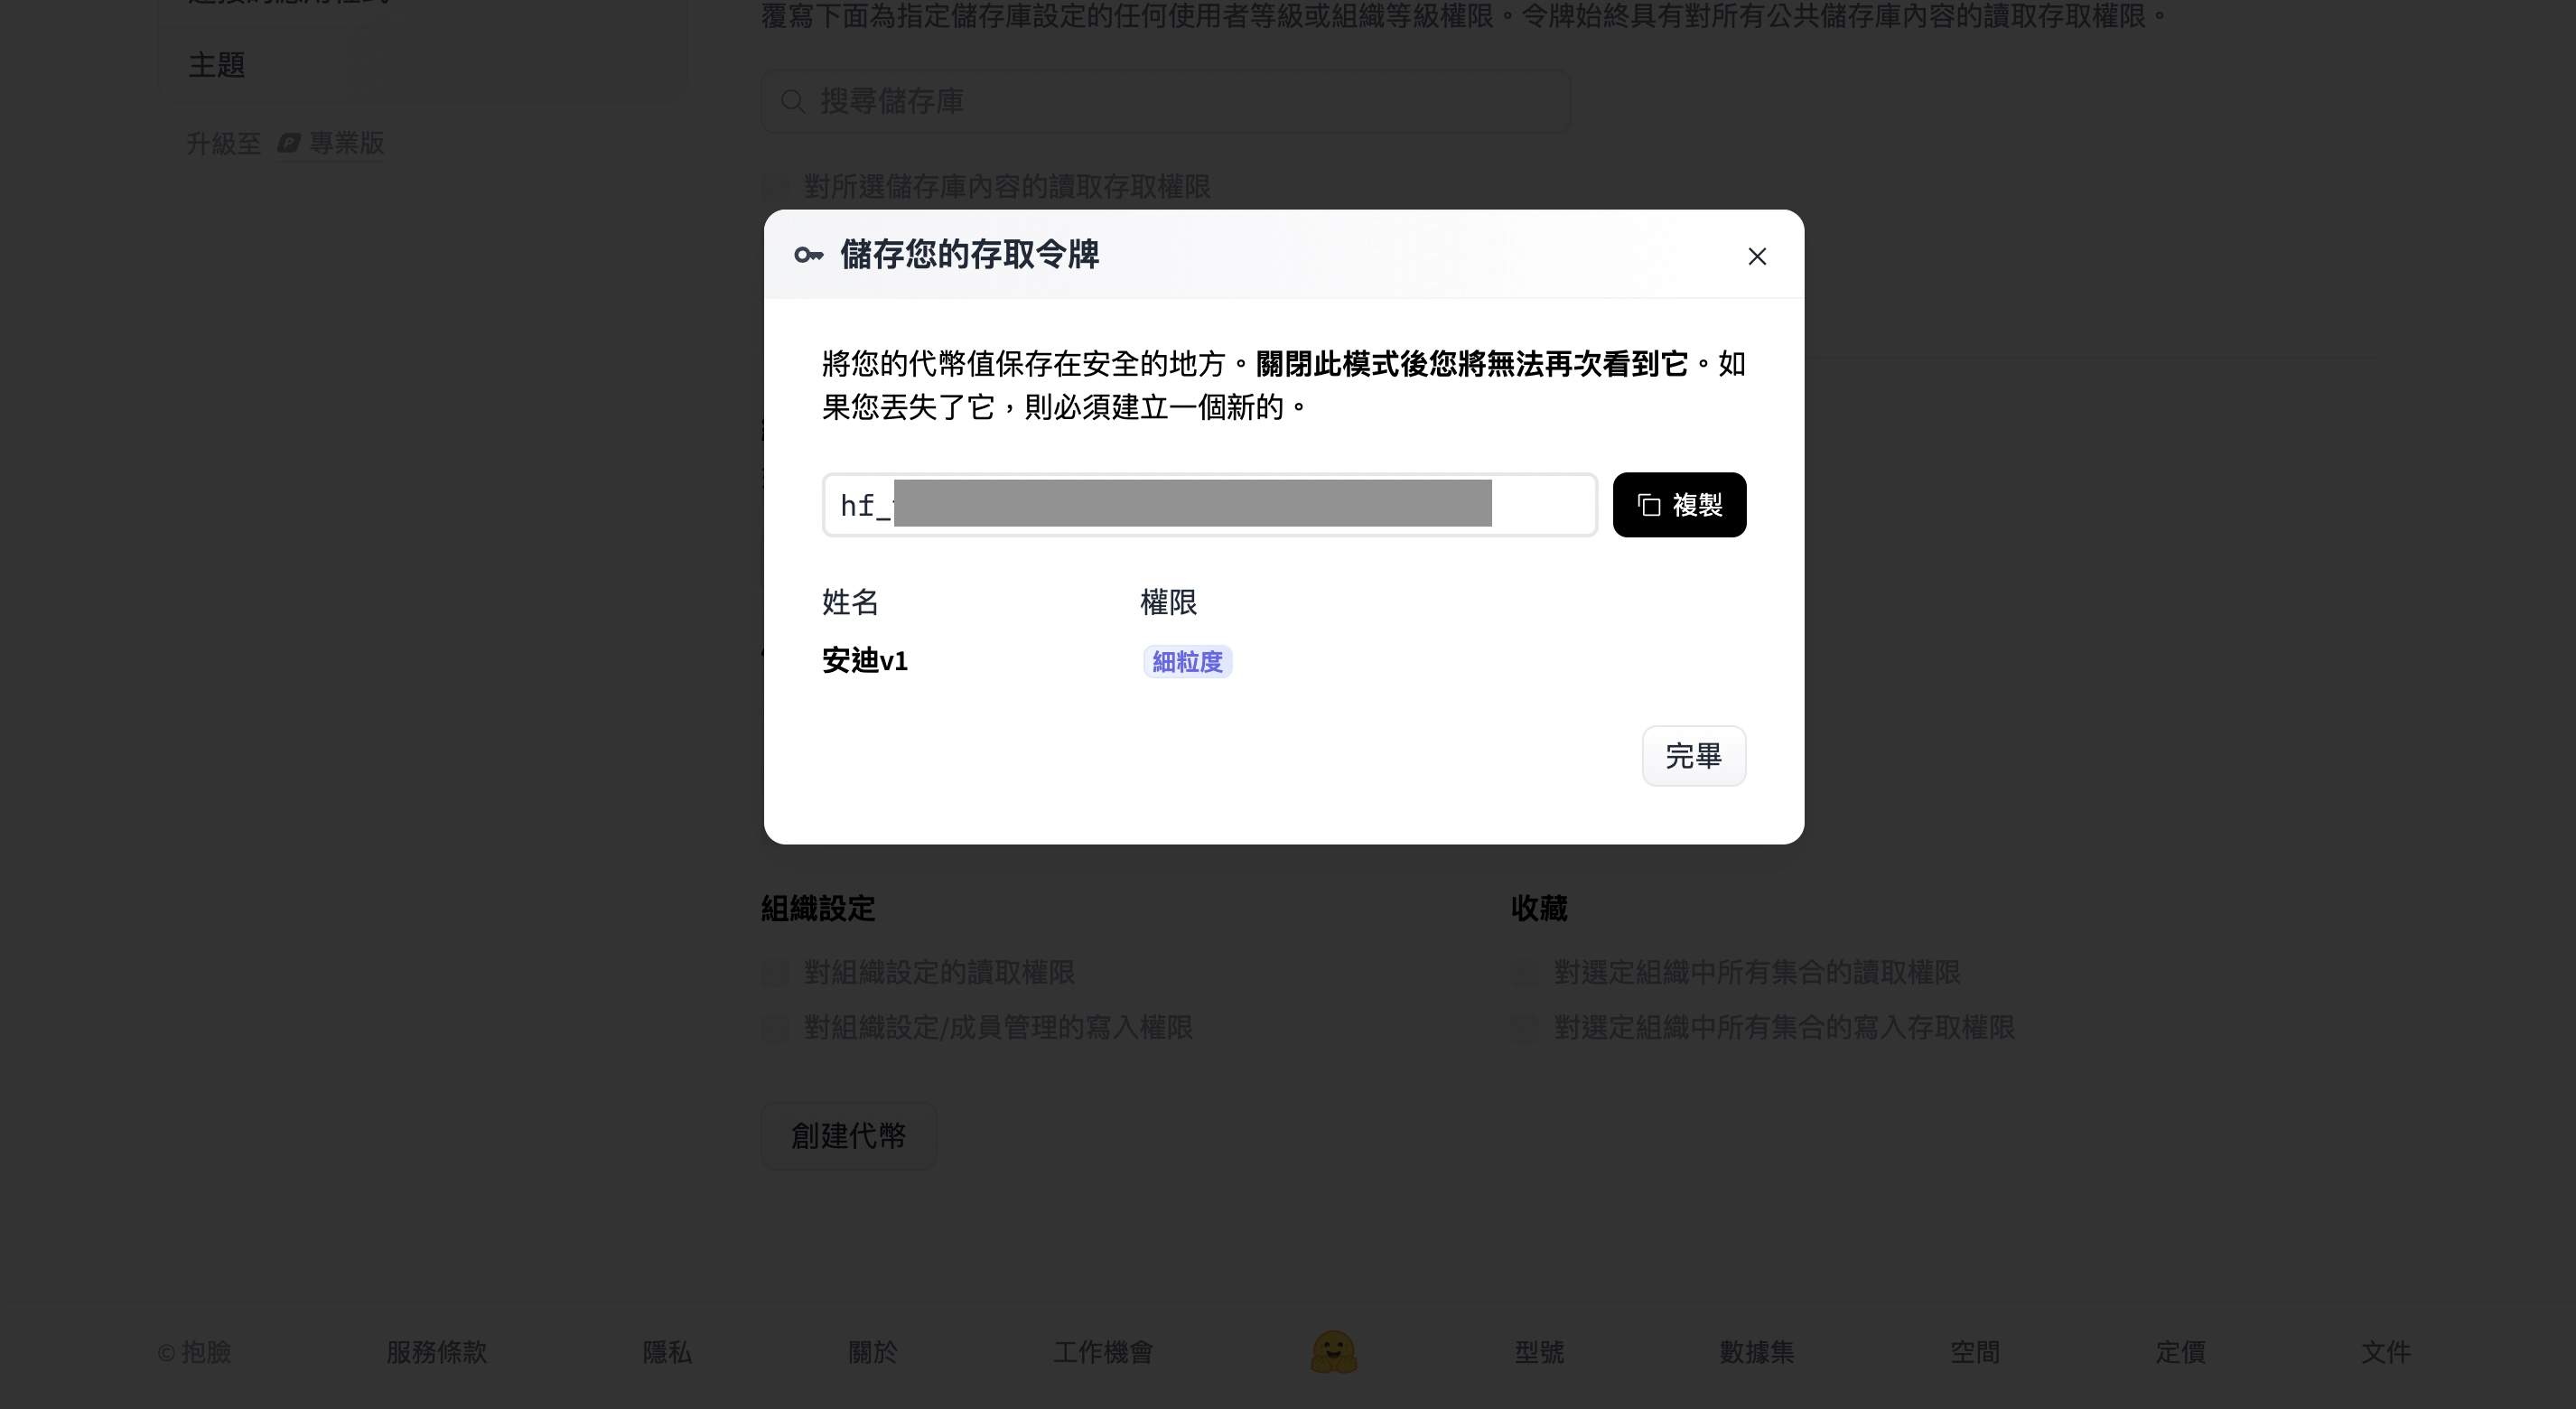
拿到Hugging Face Token,應該是hf_xxxxxxxxx開頭,拿到之後將Token帶入你的wget的指令當中的header。
!wget --header="Authorization: Bearer hf_xxxxxxxx" -P "/content/drive/MyDrive/sd-webui-files/stable-diffusion-webui/models/Stable-diffusion" "https://huggingface.co/andite/anything-v4.0/resolve/main/anything-v4.5-pruned.safetensors"
- !wget:是一個命令行工具,用來從網絡下載文件。
- -P:指定下載目錄
- https://huggingface.co/andite/anything-v4.0/resolve/main/anything-v4.5-pruned.safetensors
- 指名要下載的URL,這裡給的就是 Hugging Face models 的下載連結
如何獲取Hugging Face Models 下載連結
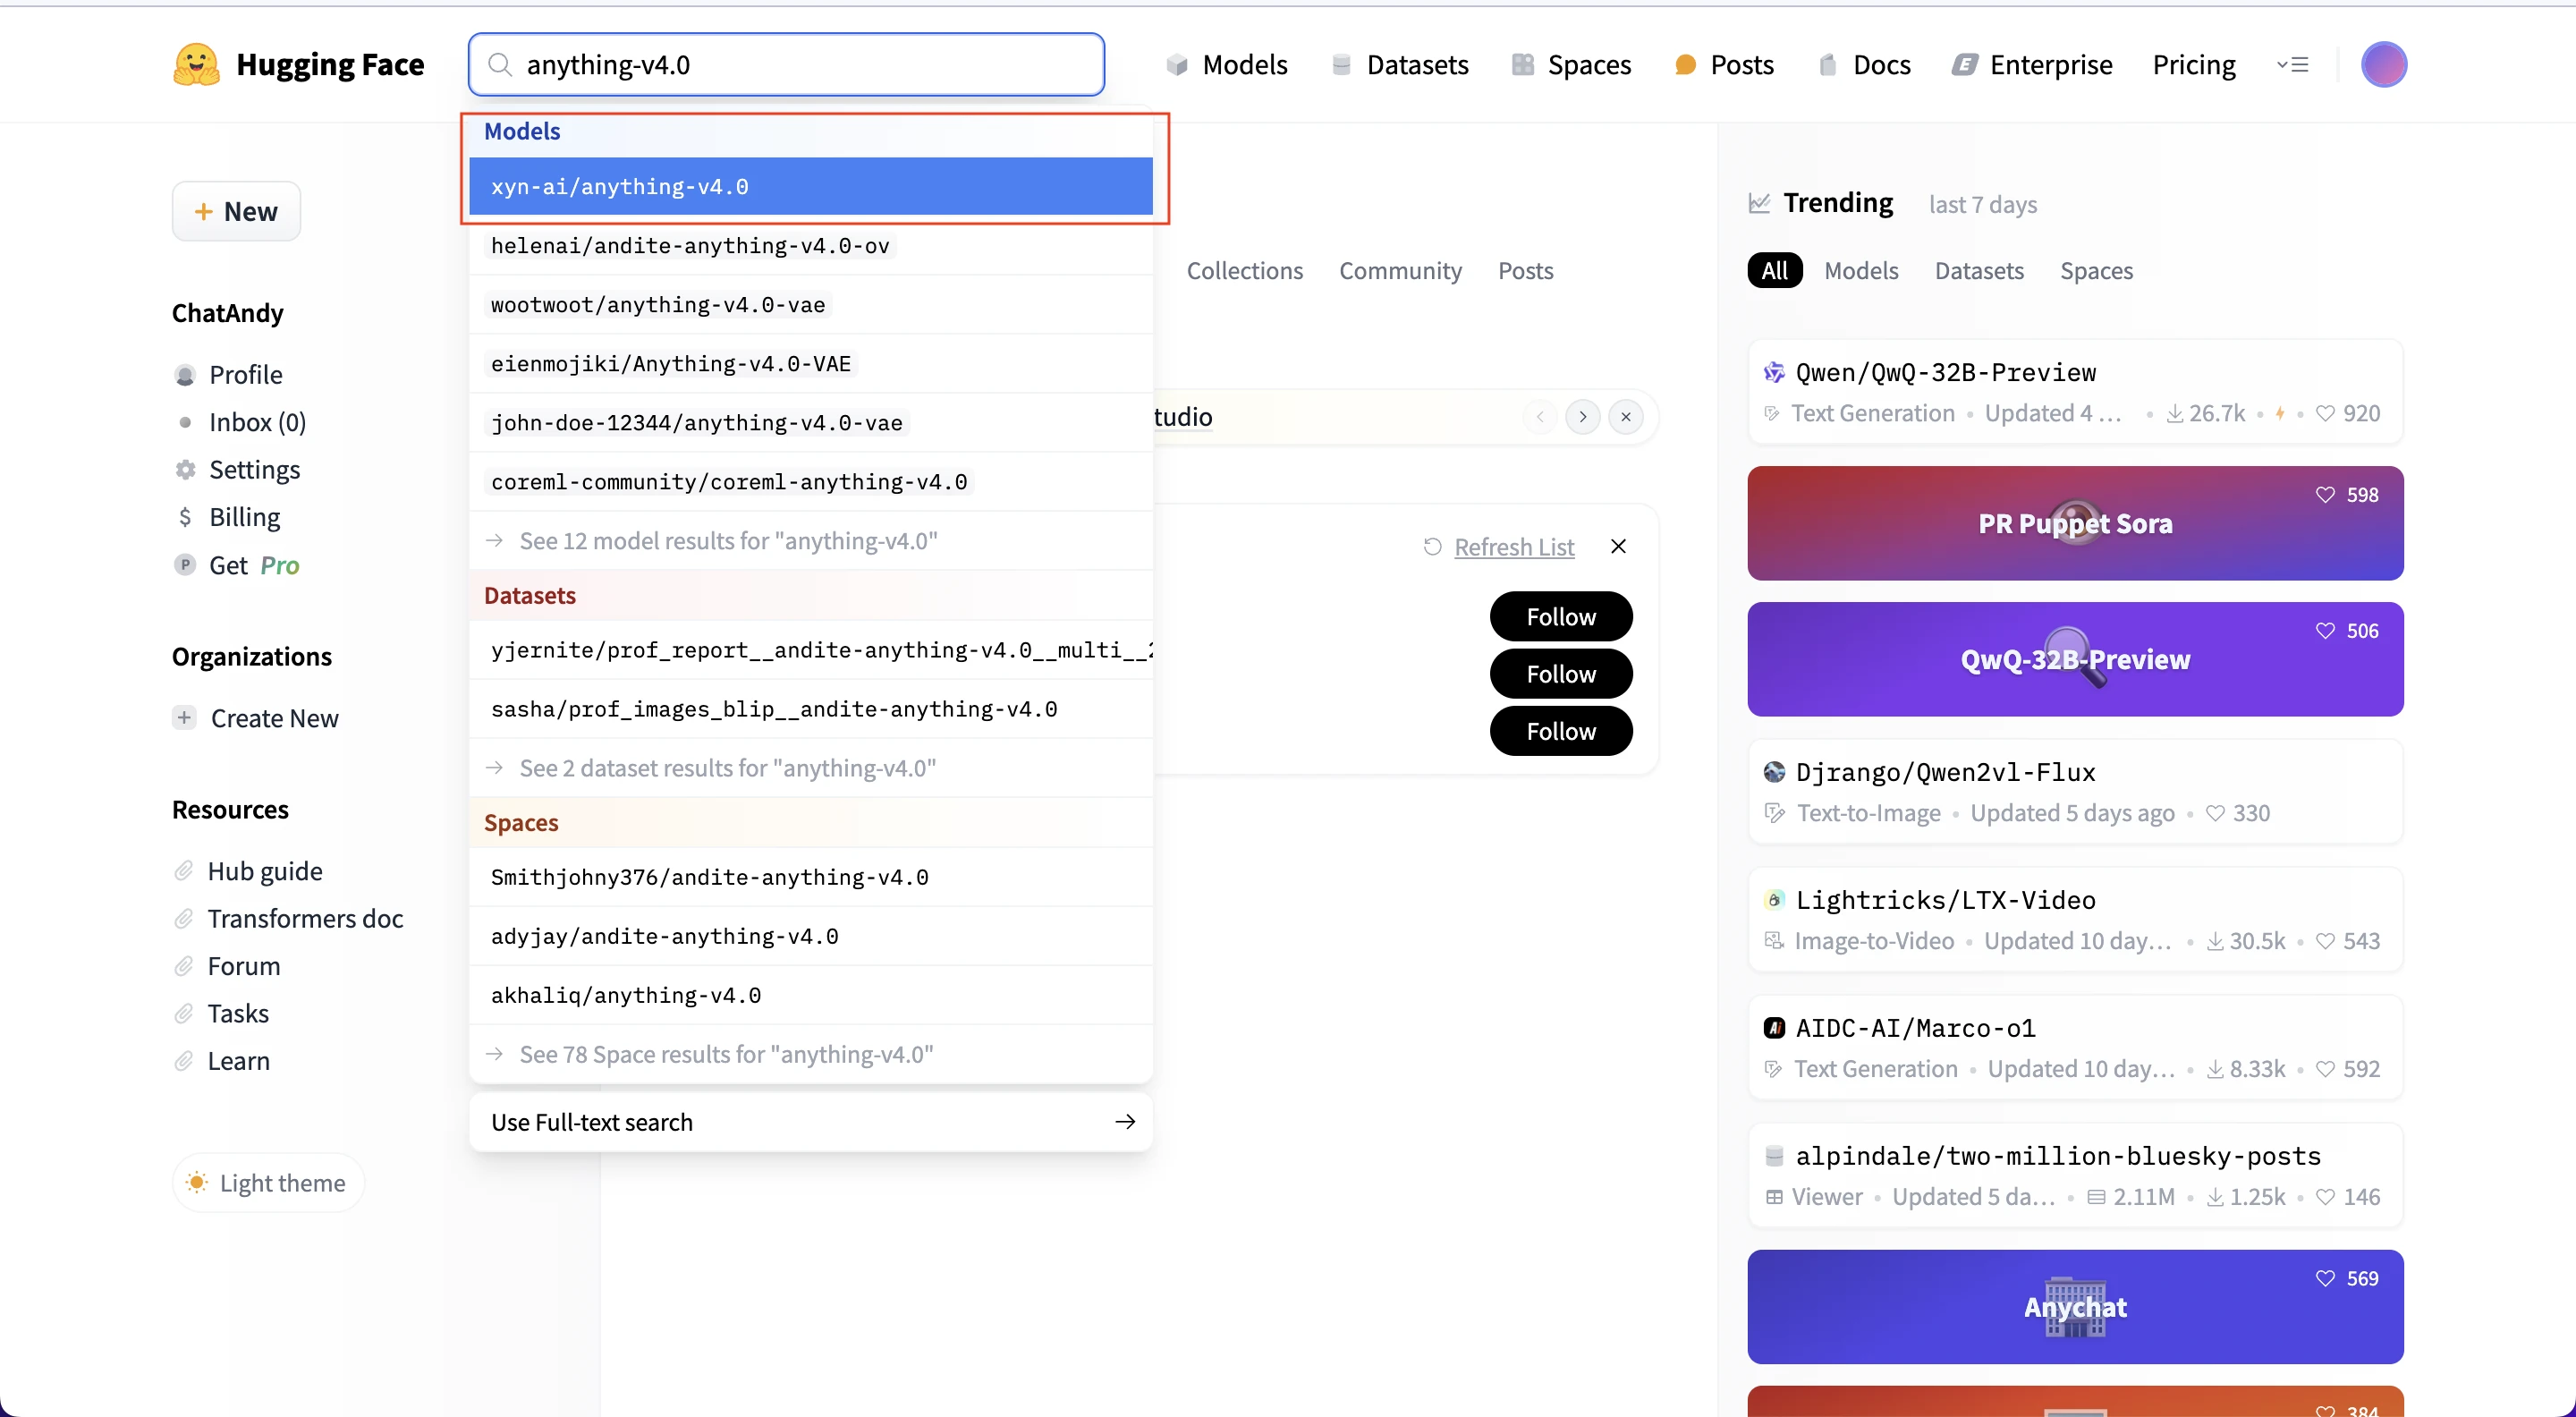
一樣要去到Hugging Face後先登入,看到這個畫面後在上方搜尋你要的Models。我這邊是搜尋anything-v4.0,也可以試試看 stable-diffusion-xl-base-1.0、stable-diffusion-v1-5。
不過要注意的是並不是每個Models都支援 stable-diffusion Web UI 像是FLUX就不行。搜雲到之後點有 “Model” 這個選項的。
點進去之後點選 “Flies and versions”
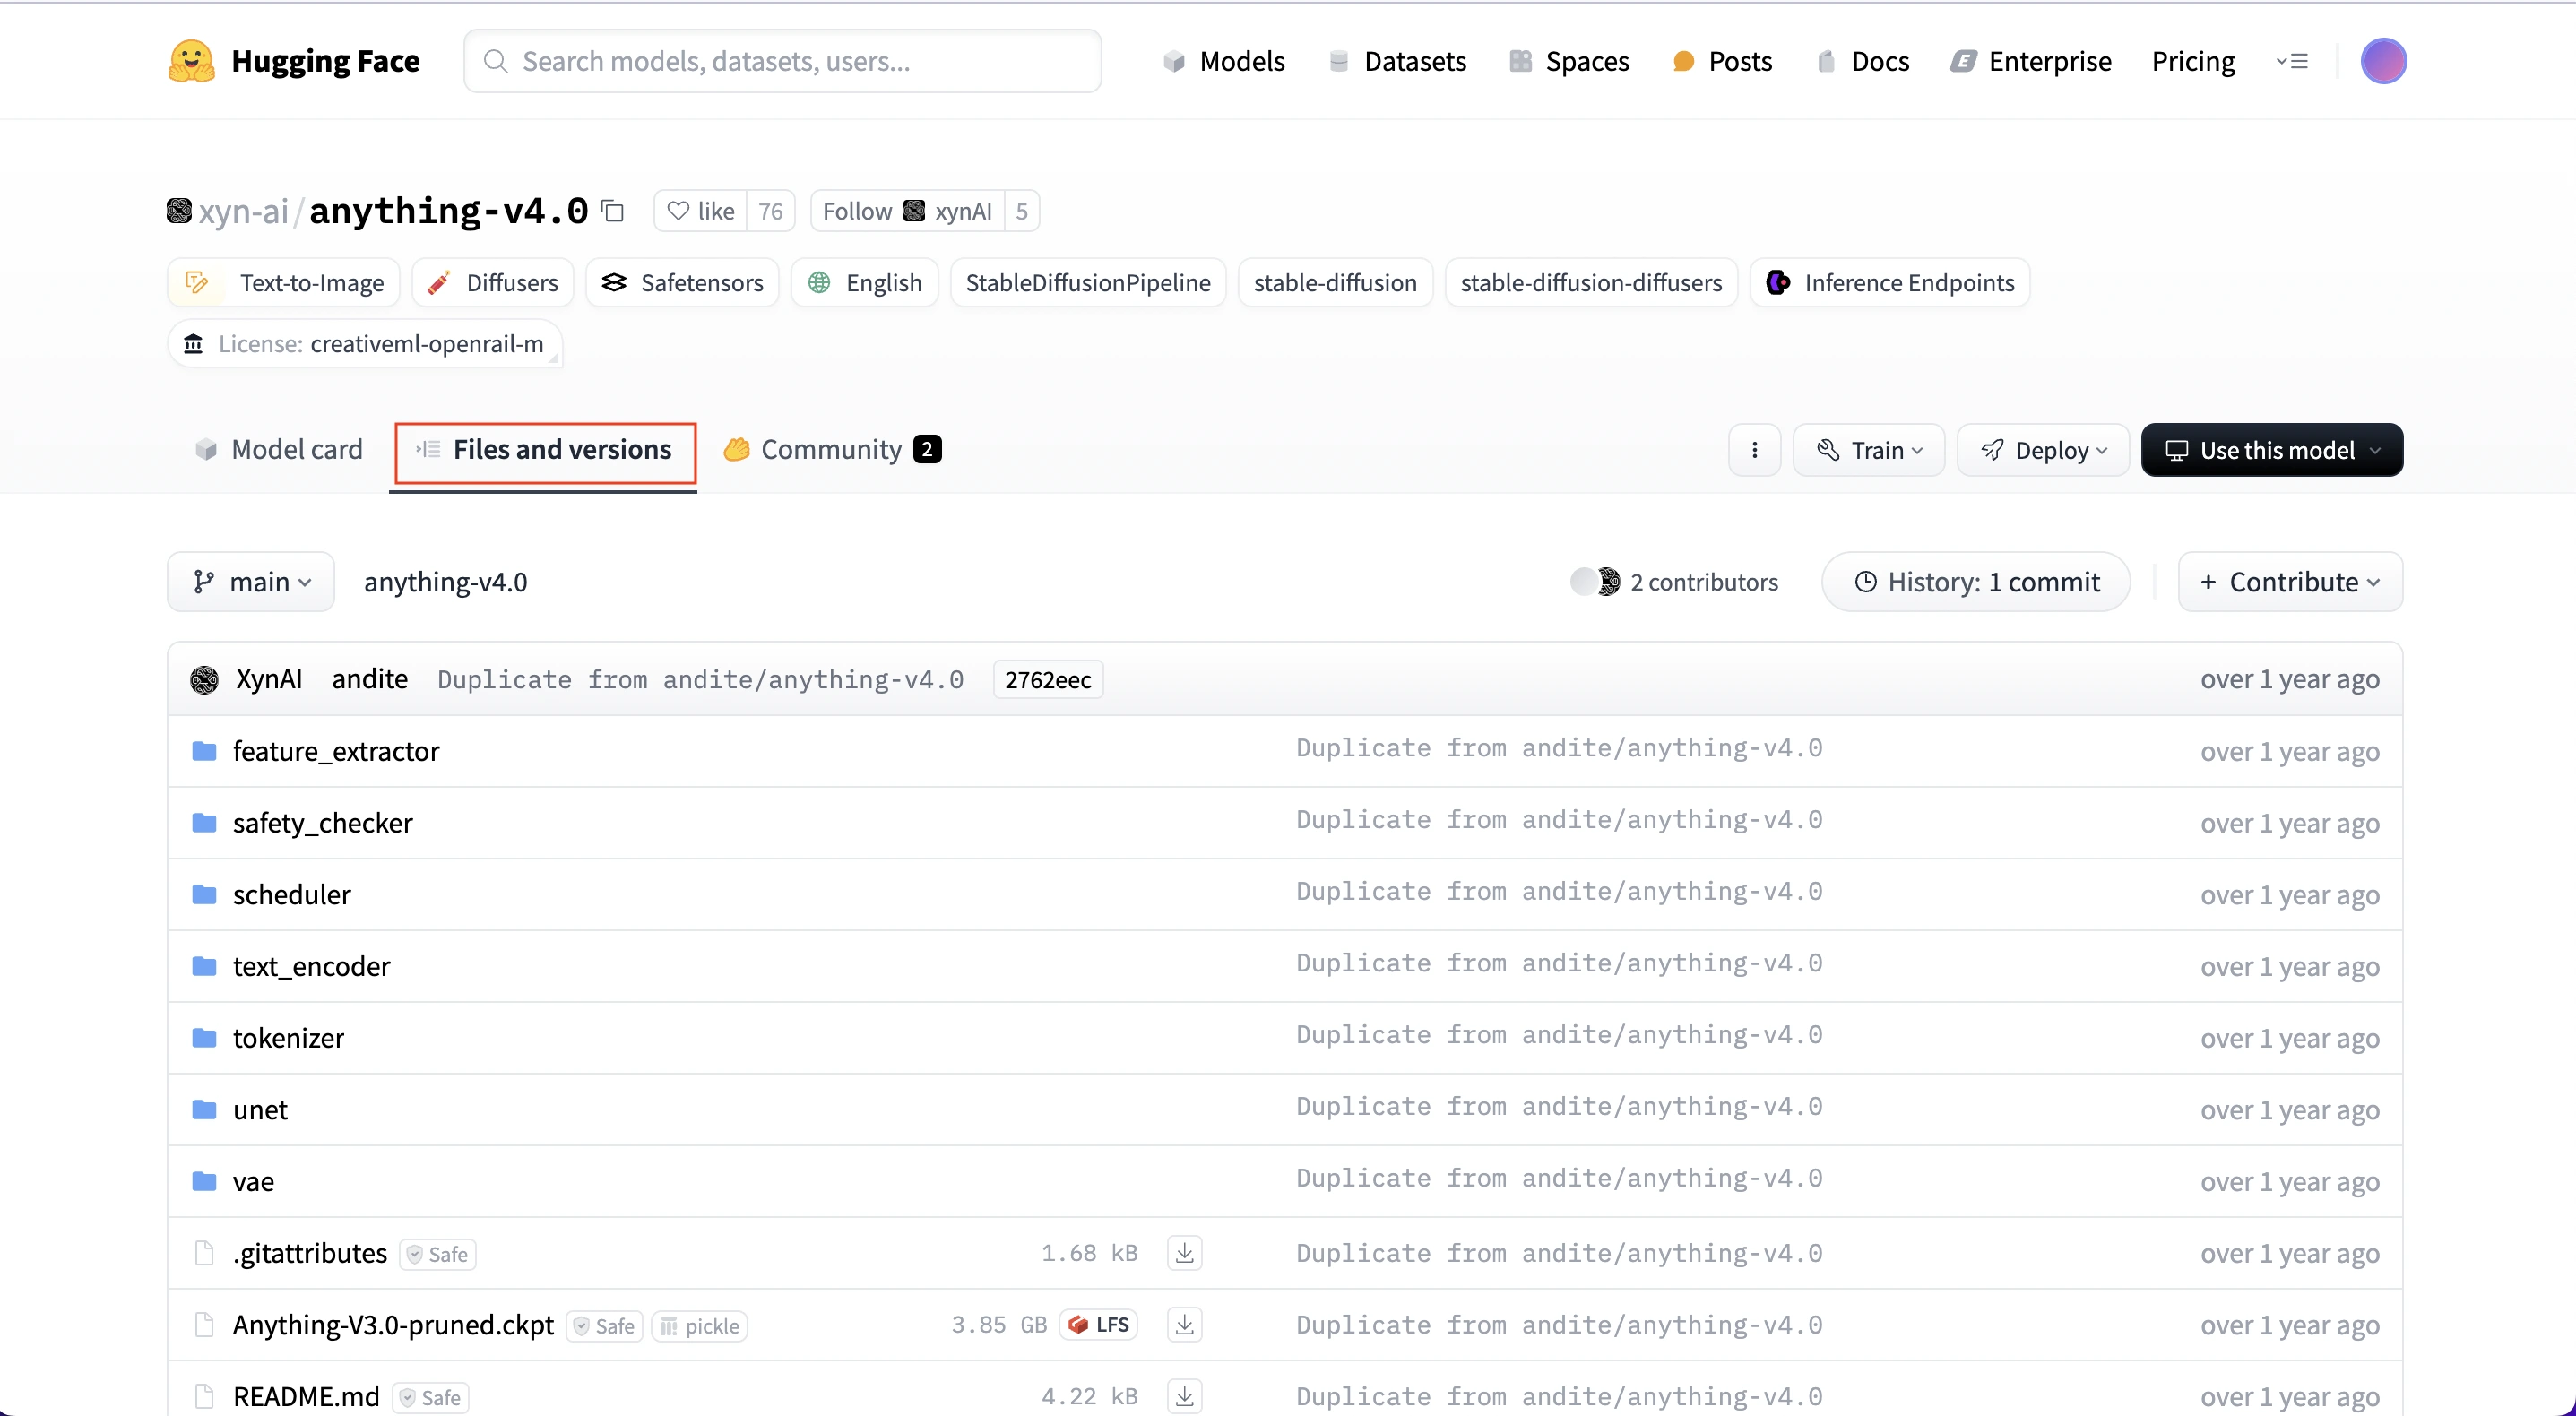
之後往下滑,一直到找到 .safetensors 這個結尾的->點進去。
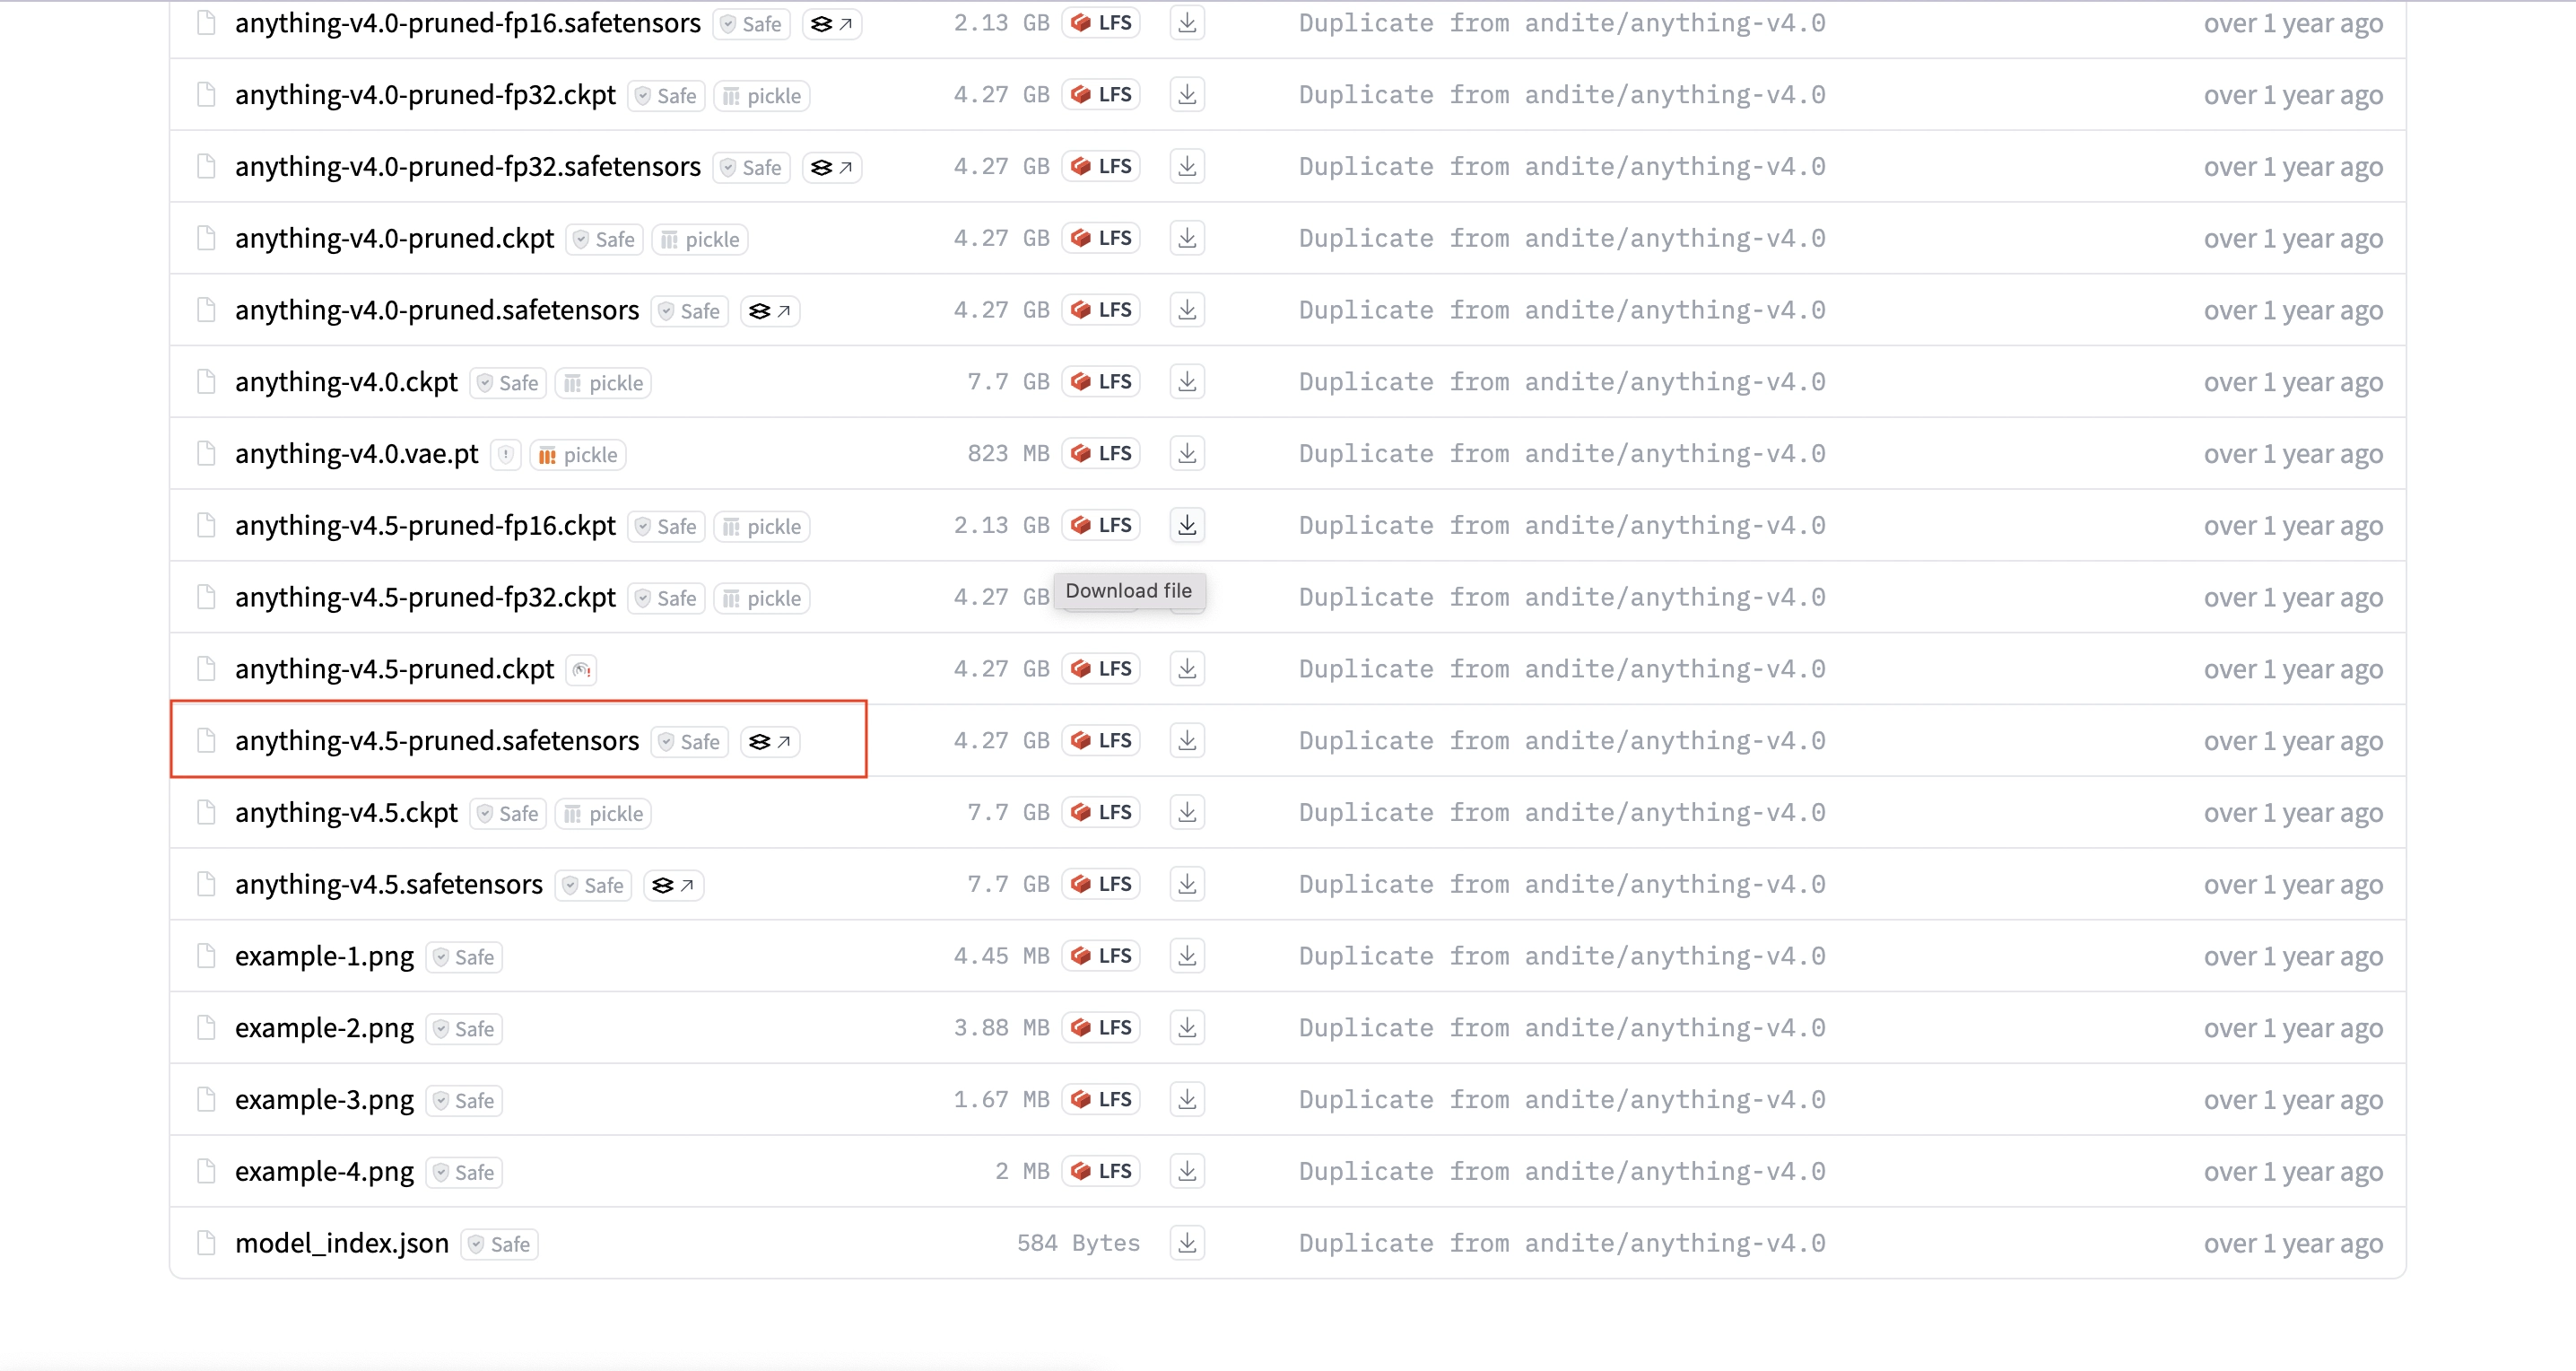
點進去會看到這個畫面,點選 “Copy download link”,然後將這個複製到的連結貼在你的指令後面。
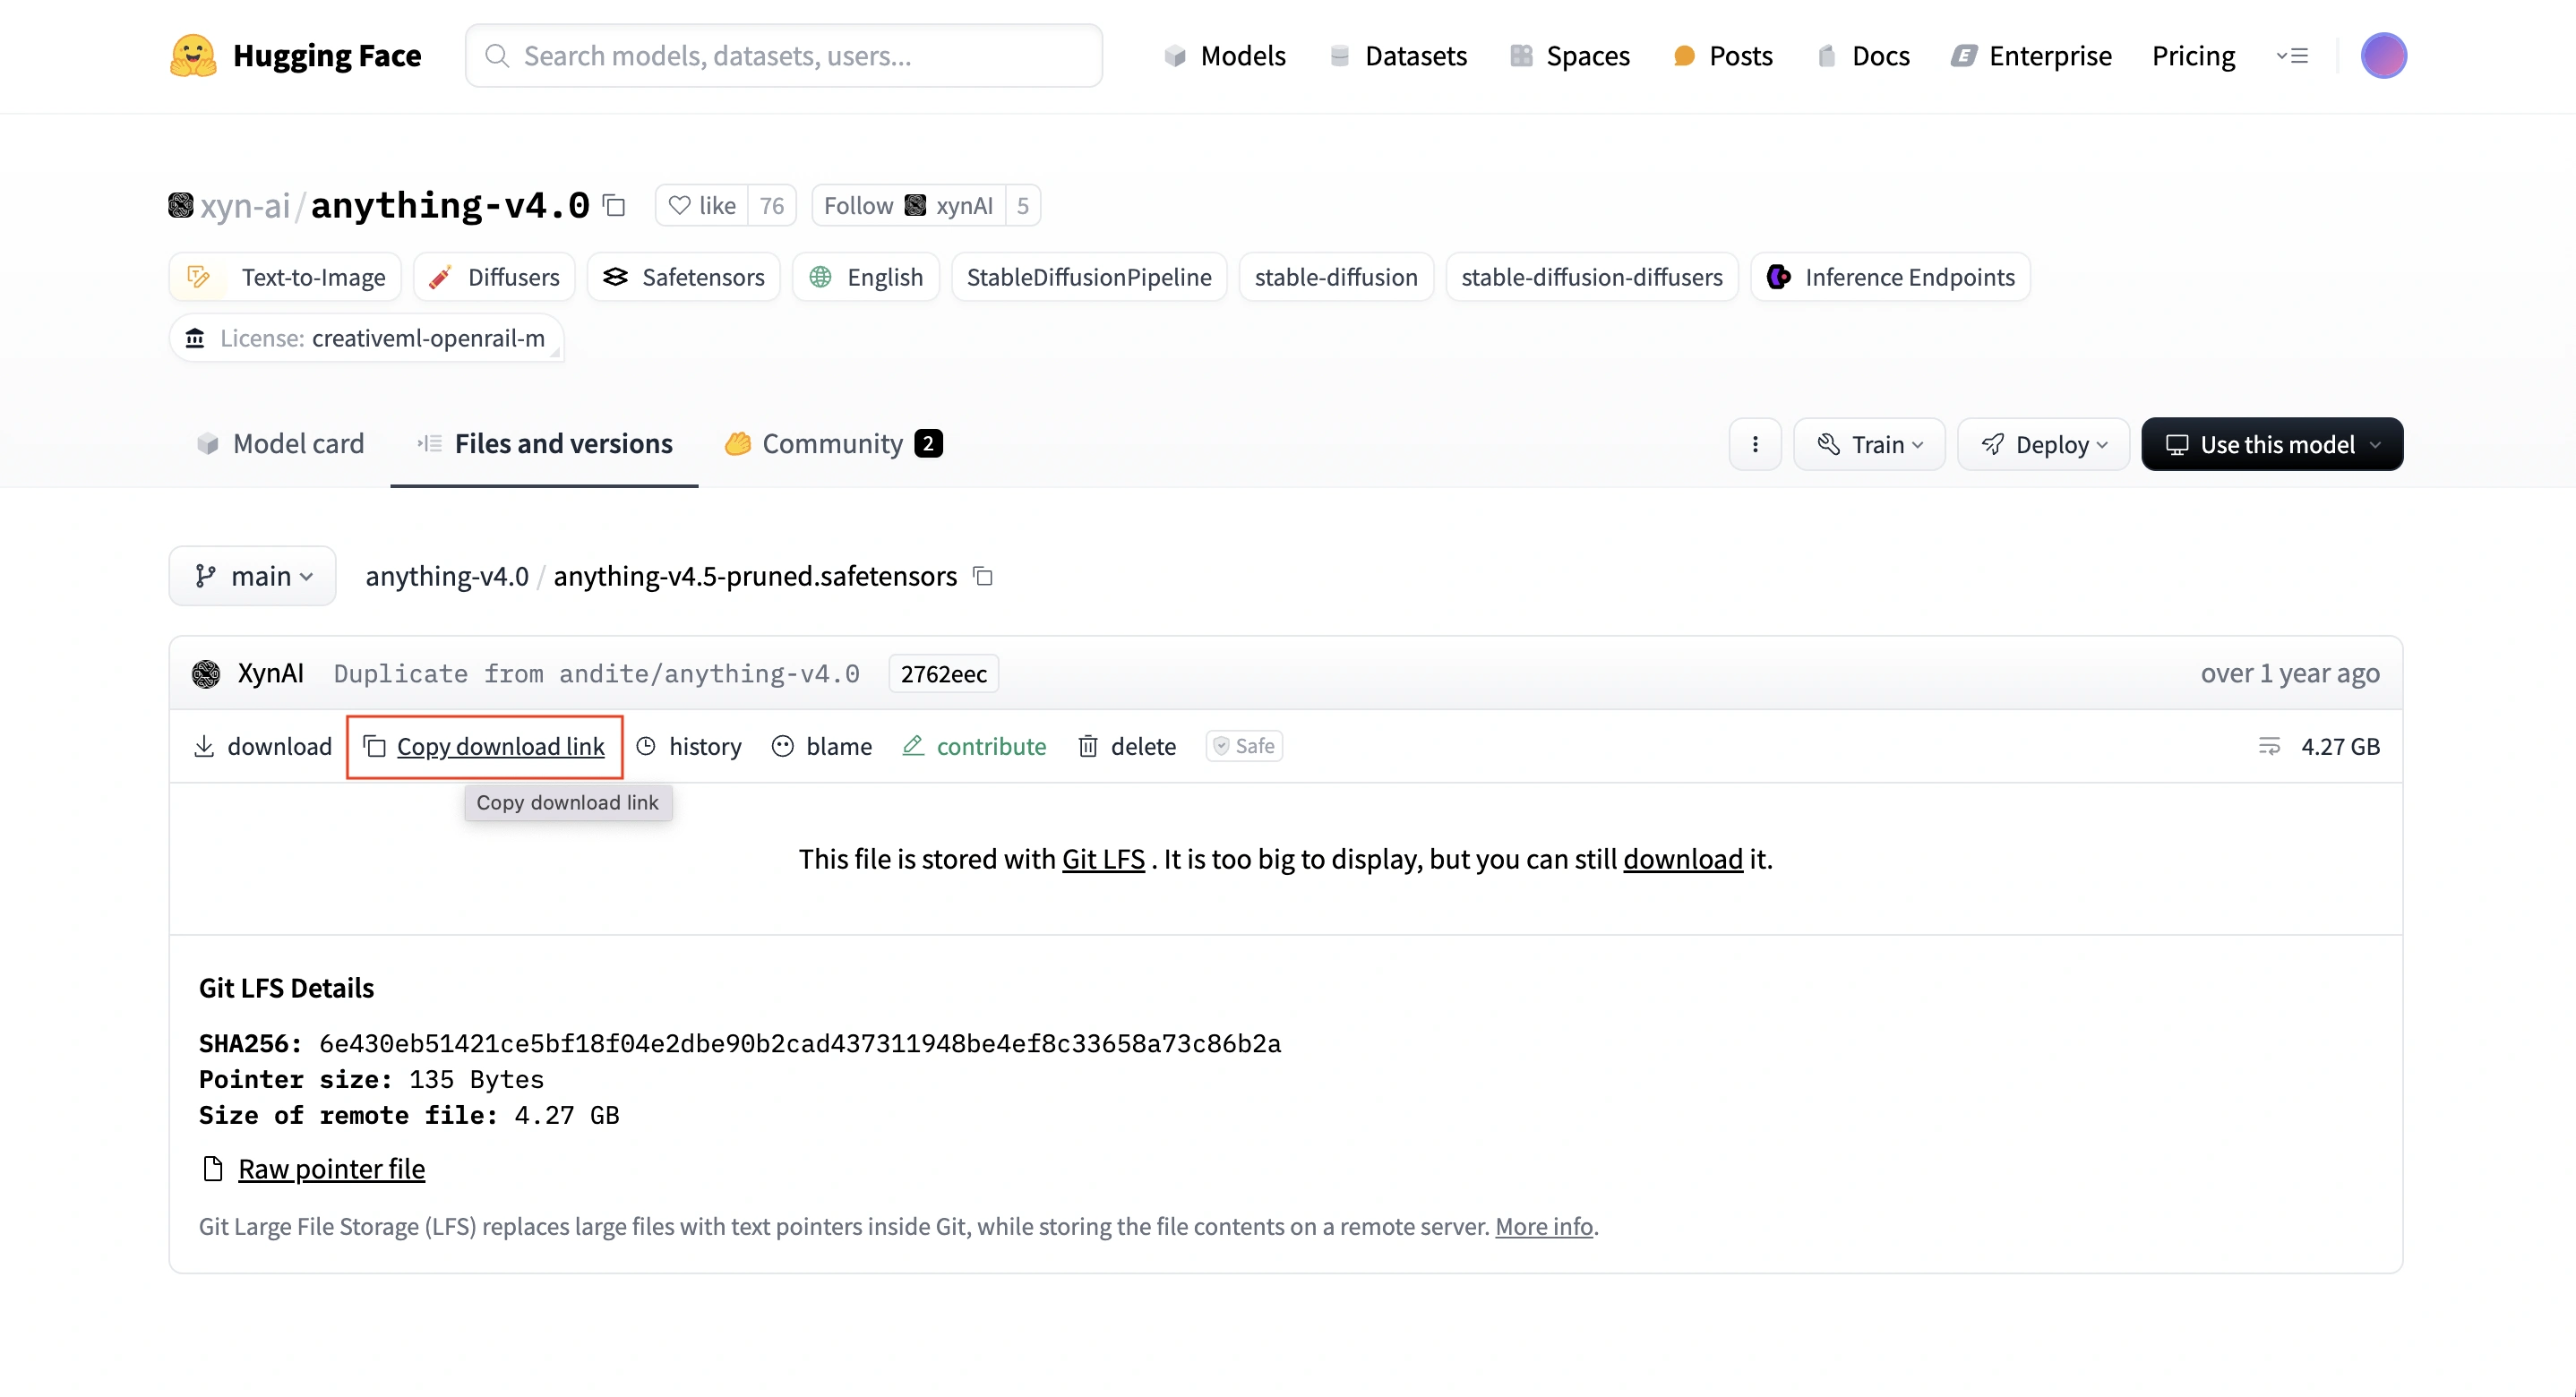
幾乎所有有在Hugging Face Models,都可以這樣使用,Hugging Face上的模型超級多,Text-to-img、img-to-text、Text-to-Video、Question Answering ,幾乎你想得到的AI的Models Hugging Face都有,之後我也會專門寫一篇文章來介紹 Hugging Face。
啟動 Stable Diffusion WebUI
!python launch.py --share --xformers --enable-insecure-extension-access --theme light
-
!python launch.py:
- !:用於執行 shell 指令。
- python launch.py:這部分錶示使用 Python 解釋器執行名為 launch.py 的腳本。 launch.py是 Stable Diffusion WebUI 的啟動腳本,負責載入模型、啟動 Web 伺服器等操作。
-
–share:
- 這個參數會使 Gradio 自動產生一個公共鏈接,你可以透過這個連結在瀏覽器中存取 Stable Diffusion WebUI。
-
–xformers:
- 這個參數啟用 xformers 函式庫,這是一個用來加速 Stable Diffusion 推理過程的函式庫。使用 xformers 可以顯著提高生成影像的速度和效率。
-
–enable-insecure-extension-access:
- 允許加載或使用系統內部標記為「不安全」的擴展或插件。因為 Colab 是一個共享的雲端環境,這個參數可以用來允許某些擴展功能的加載,特別是 Stable Diffusion Web UI 。
-
–theme light:
- 這個參數設定 WebUI 的主題為淺色主題。也可以使用 –theme dark 來設定深色主題。
完整版程式
只有第一次要輸入這麼多指令,因為需要下載模型、創立資料夾、git clone stable-diffusion-webui。
from google.colab import drive
drive.mount('/content/drive')
!mkdir /content/drive/MyDrive/sd-webui-files
!pip install torch==1.13.1+cu116 torchvision==0.14.1+cu116 torchaudio==0.13.1 --extra-index-url https://download.pytorch.org/whl/cu116 -U
!pip install -q xformers==0.0.16
!pip install -q triton==2.0.0
!git clone --depth=1 https://github.com/AUTOMATIC1111/stable-diffusion-webui.git /content/drive/MyDrive/sd-webui-files/stable-diffusion-webui
!wget --header="Authorization: Bearer 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" -P "/content/drive/MyDrive/sd-webui-files/stable-diffusion-webui/models/Stable-diffusion" "https://huggingface.co/andite/anything-v4.0/resolve/main/anything-v4.5-pruned.safetensors"
%cd /content/drive/MyDrive/sd-webui-files/stable-diffusion-webui/
!git reset --hard
!git pull
!sed -i -e 's/checkout {commithash}/checkout --force {commithash}/g' launch.py
!python launch.py --share --xformers --enable-insecure-extension-access --theme light
如果沒有意外的話,Stable Diffusion WebUI應該就跑起來了。會從Colab這裡看到“Runnging on public URL”,
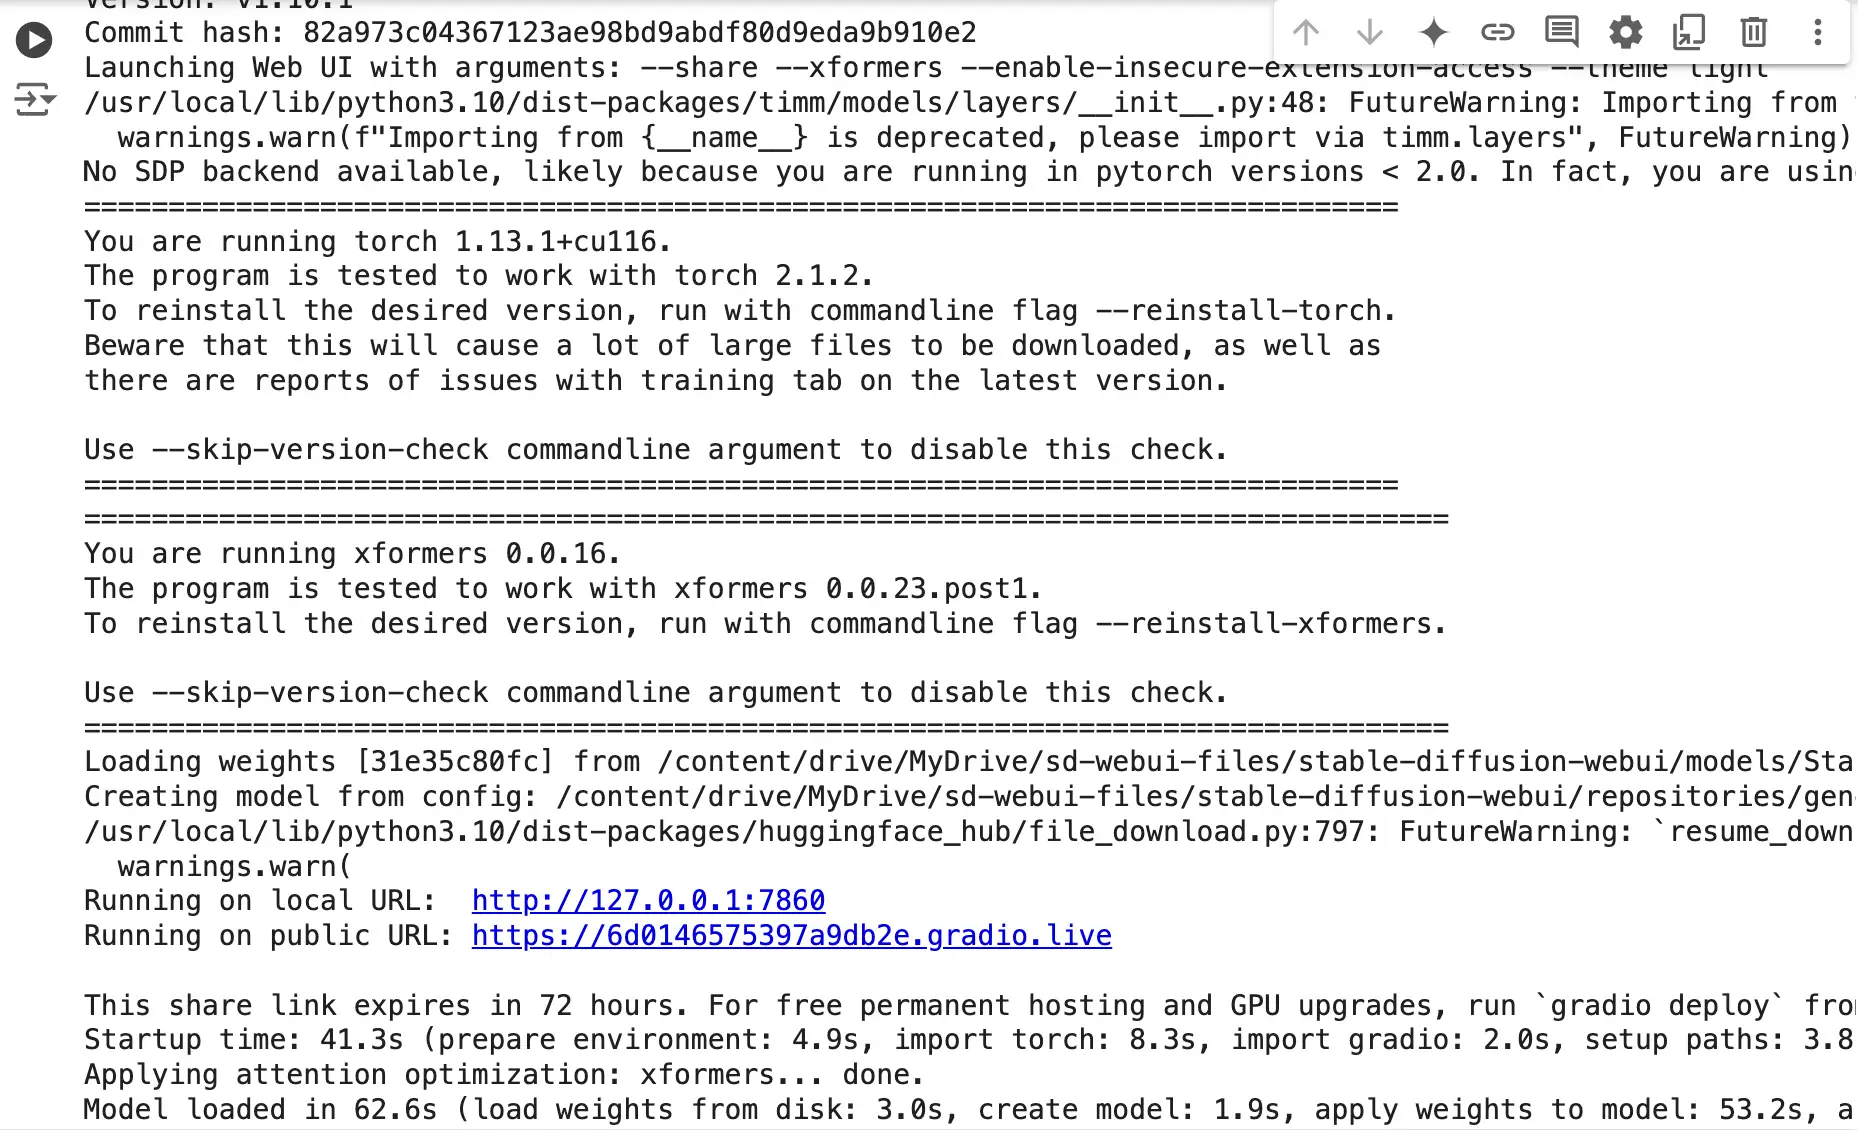
點進去就可以看到就可以看到Stable Diffusion WebUI 的畫面了,那我們就嘗試算一張圖吧!
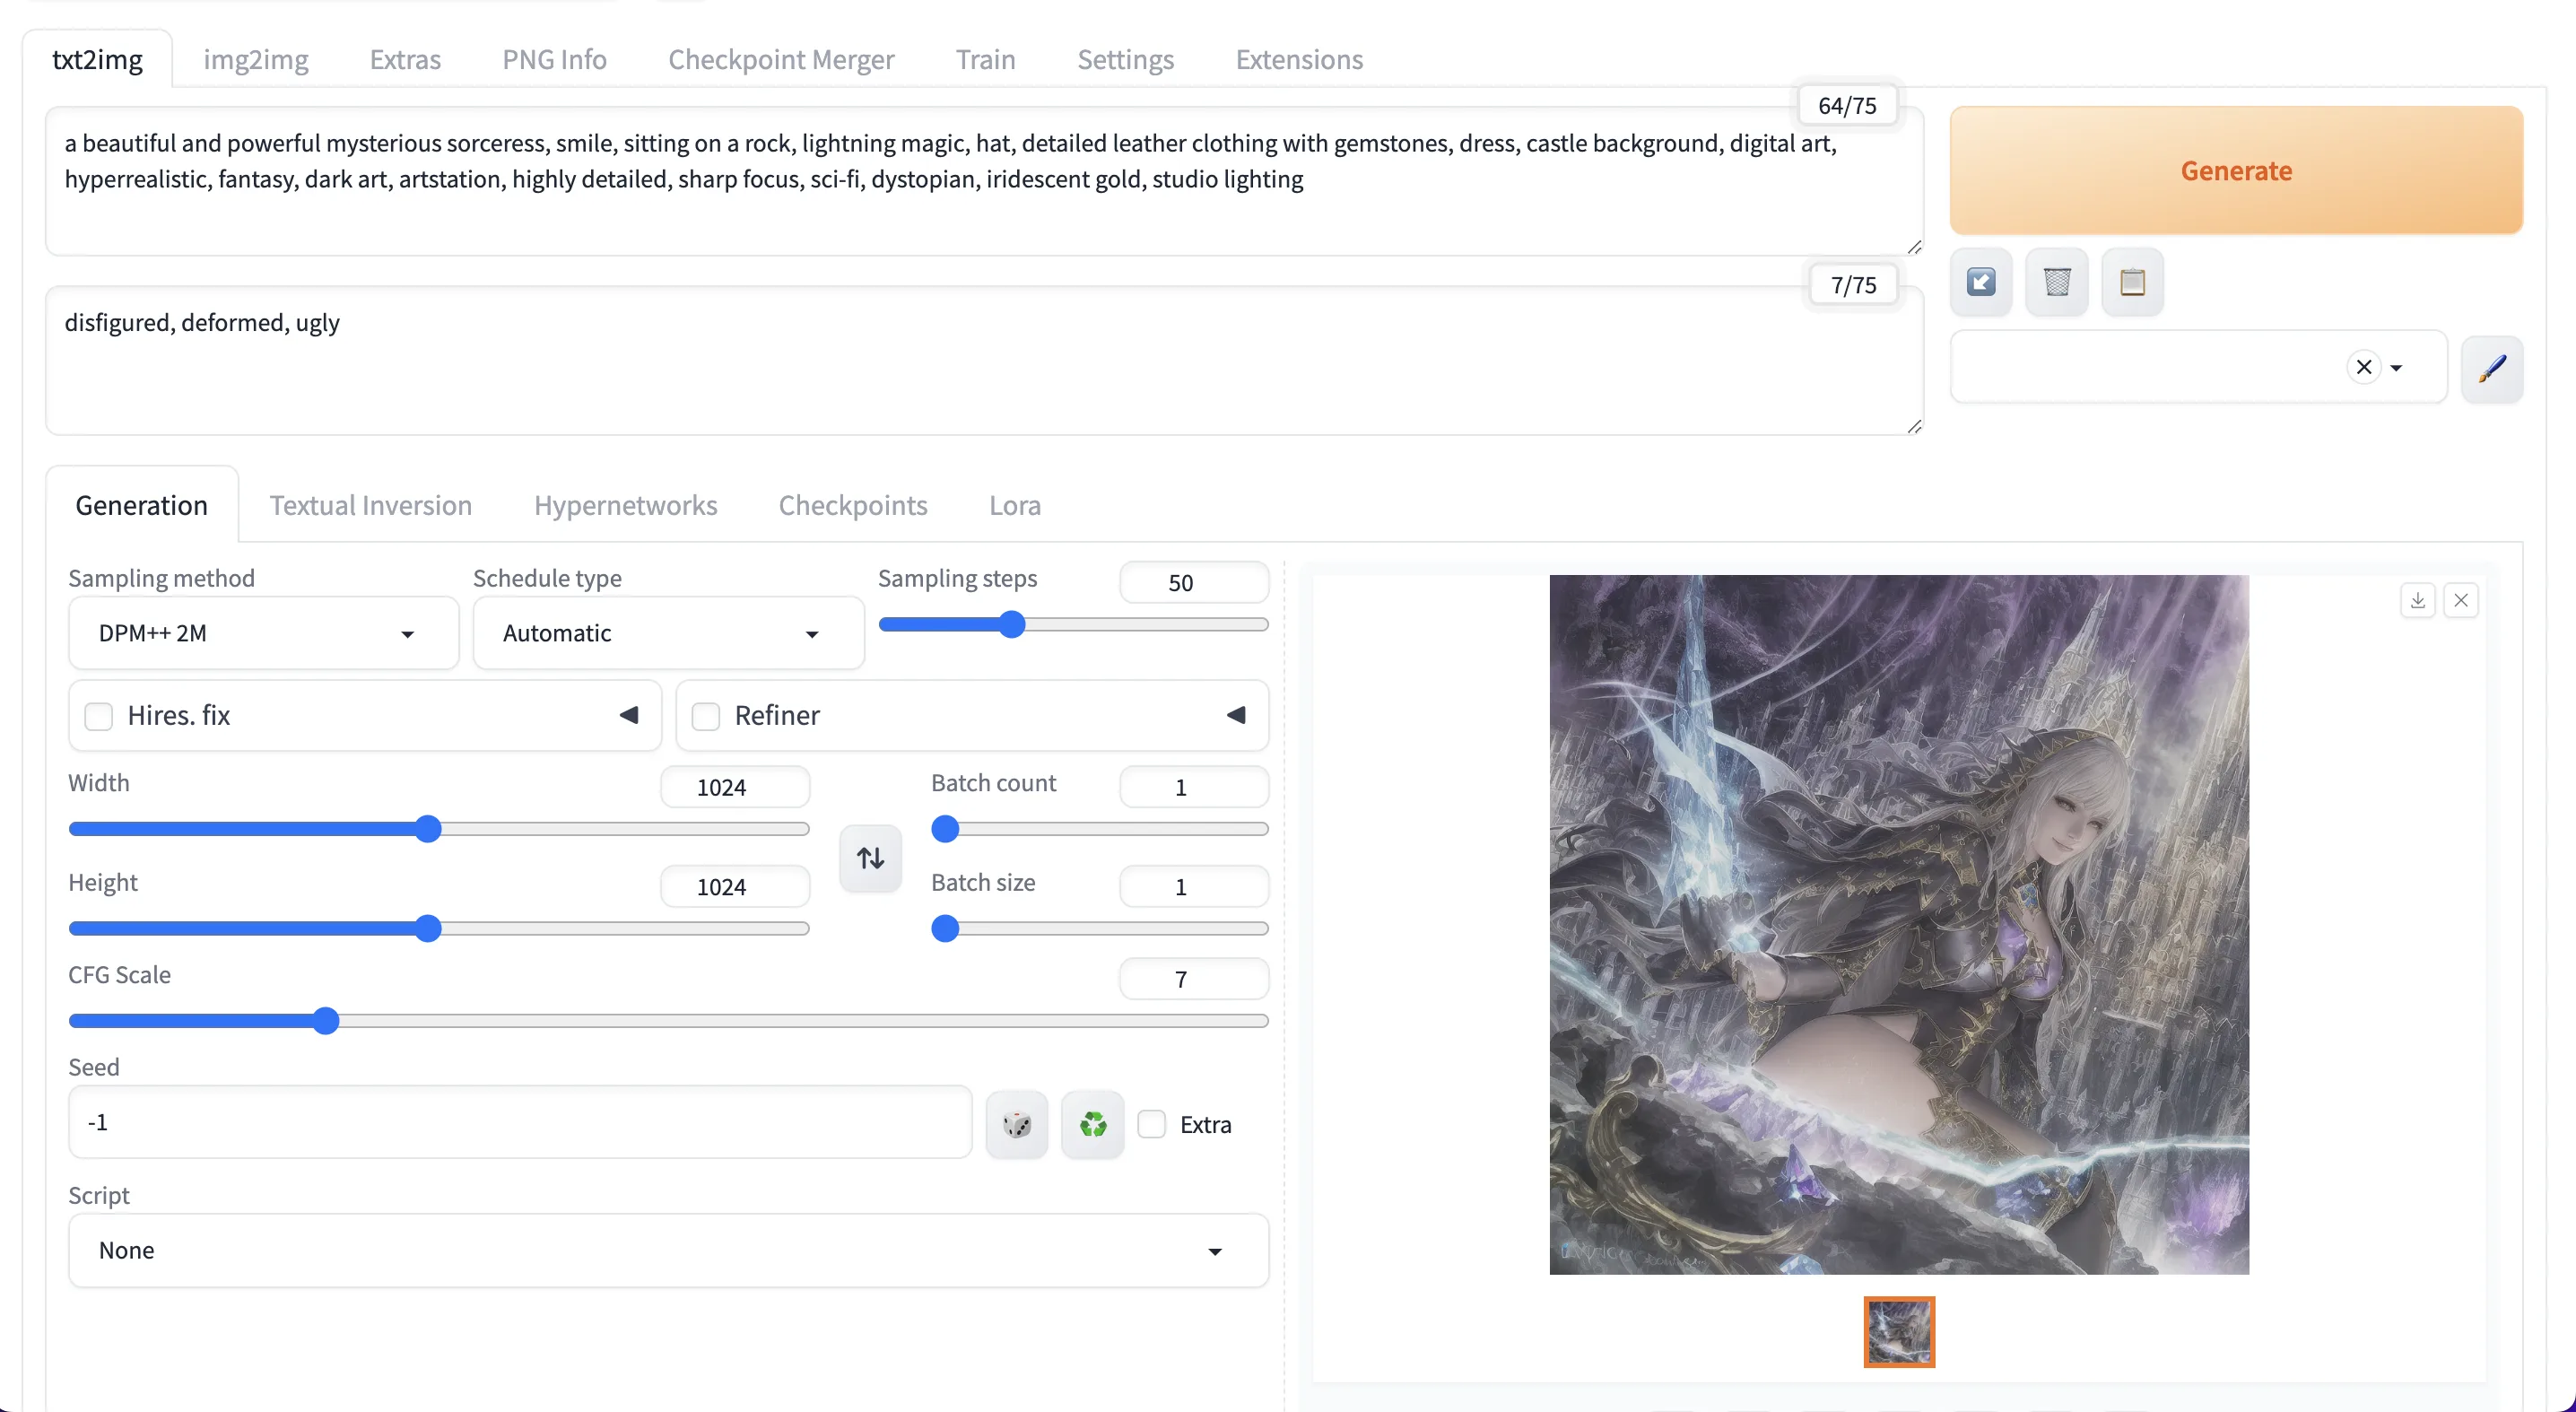
不得不說Google Colan提供的gpu nvidia tesla t4真的很強大,很快就跑完了。由於我這是跑的是anything-v4.5這個模型,這個模型會比較偏二次元。
如果是第二次跑的話可以將筆記本裡面的程式簡化成:
from google.colab import drive
drive.mount('/content/drive')

!pip install torch==1.13.1+cu116 torchvision==0.14.1+cu116 torchaudio==0.13.1 --extra-index-url https://download.pytorch.org/whl/cu116 -U
!pip install -q xformers==0.0.16
!pip install -q triton==2.0.0

%cd /content/drive/MyDrive/sd-webui-files/stable-diffusion-webui/

!python launch.py --share --xformers --enable-insecure-extension-access --theme light
另外如需要查看,GPU的使用情況,包含溫度、使用率和記憶體占用,以及驅動程序和 CUDA 版本的信息。
輸入
nvidia-smi
後續會陸續更新提示詞技巧、參數說明、以及一些外掛的使用教學(ControlNet)。
(未完待續)
相關參考連結:
Recent Posts
目錄